Sunday, May 22, 2016

Raspberry Pi Server

I've been using a company that offers subversion (SVN) hosting, and it has been working very well. Subversion is an excellent way to manage code/resources. It keeps records of every change, notes on each change, and who committed the changes. Git is another, probably more popular, code/resource management system. Although Git has some technical advantages, especially with larger remote teams, I find it overly complicated when I just want to mess with my own projects. If you have ongoing coding projects, set yourself up with some kind of revision control such as Subversion or Git. Trust me!

As my projects have grown in size, the cost to host them remotely is also increasing. On top of that, I just want to have my Raspberry Pi do some useful server stuff for me anyways. So, I moved all my SVN hosting to my local Raspberry Pi. Then I thought - shoot a local FTP server would come in handy to transfer files, let me get that setup. I've got some projects that could be hosted on a website in the future, let me get that setup. It would be nice to remotely login to the Raspberry Pi so it no longer needs a keyboard/screen, let me get that setup.


There are tons of tutorials for each individual task online already, but at this point writing about my snowball of requirements may be something useful to others. So I'll do my best to recap what I did! (I was basically done by the time I thought others may find this helpful.)

I'm working with a Raspberry Pi B+. At the time I bought it, it was the highest performance Pi on the market. I'll probably buy a Raspberry Pi 3 fairly soon and do all the instructions all over again. (So did I write this to help others online? Or just so I wouldn't forget all the steps when I do it again in a few months? ... Can it be both?)

Quick list of what will be done:

1. Setup Network
2. Shell Access (SSH)
3. Version Control (SVN)
4. File Transfer (SFTP)
5. Web Server


My steps...

1 Setup Network

You may have your Raspberry Pi using DHCP (Pi asks your router for the IP address), but in my case my Pi will not necessarily be connected to my router. Only do the following steps if you want a static IP! If you can access the Internet right now with your Pi and you don't have a reason to change it, then you're probably good - skip this step.

To configure the network from a terminal window:
sudo nano /etc/network/interfaces


The lines with "lo" are for configuring the loopback.

To configure the ethernet device for static IP:
iface eth0 inet static
My local network is 10.0.1.### so I configured the IP address to something memorable and out of the way (high):
address 10.0.1.200

All computers on my local network are 10.0.1.###, so I configured the subnet to:
netmask 255.255.255.0

Broadcast to my local network:
broadcast 10.0.1.255

And the gateway set to:
gateway 10.0.1.1


In nano, hit CTRL X to exit, Y to agree to save, and then push enter to confirm the filename.

And restart the networking:
sudo ifdown eth0 && sudo ifup eth0

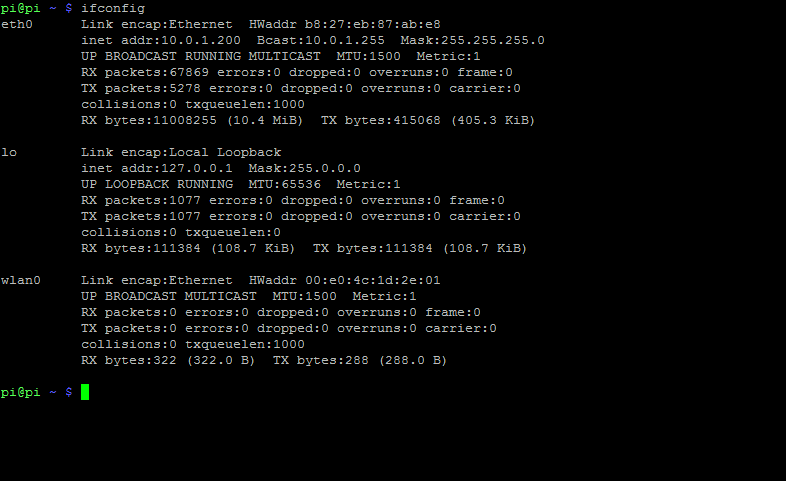
To see how the network is configured, type:
ifconfig

2 Shell Access (SSH)

I have no plans on using X Windows on the Raspberry Pi, so remote shell access is more than enough for me. I downloaded PuTTY as a SSH Client on my Windows computer so that I could login to my Raspberry Pi remotely.

To enable shell access on the Raspberry Pi, type:
sudo raspi-config
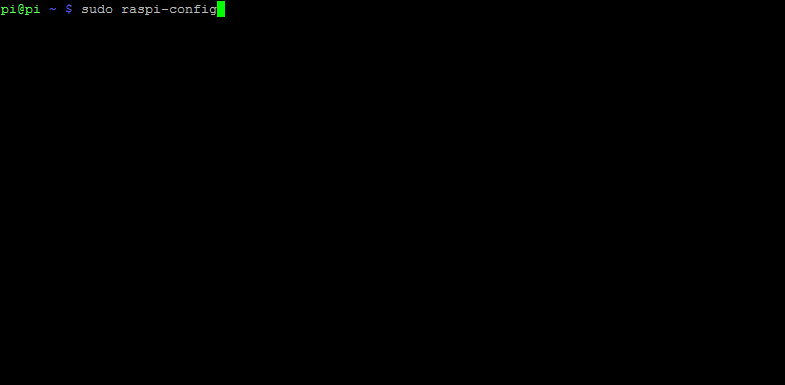


Then select "8 Advanced Options"


Then select "A4 SSH"


Then select "Enable"


The SSH server should be good to go!

I set my Pi to a static IP address of 10.0.1.200.

When I run PuTTY on my Windows computer:


And clicking Open...


No more keyboard and monitor required for the Pi!

3 Version Control (SVN)

To download and install the SVN software:
sudo apt-get install subversion

Then to create the folder for all the repositories to be held:
mkdir -p /home/pi/repos

Then create each repository:
svnadmin create /home/pi/repos/projectname
Where projectname is what your project is. I created a half dozen, including "arduinoComputer", "gps", and "orbitalAero".


Finally download and install Apache SVN:
sudo apt-get install apache2 libapache2-svn

Edit dav_svn.conf:
sudo nano /etc/apache2/mods-available/dav_svn.conf


The file has a bunch of entries almost ready to go, they're just commented out. I modified mine to look like:
<Location /svn>

  # Uncomment this to enable the repository
  DAV svn

  #Alternatively, use SVNParentPath if you have multiple repositories under
  # a single directory (/var/lib/svn/repo1, /var/lib/svn/repo2, ...)
  # You need either SVNPath and SVNParentPath, but not both.
  SVNParentPath /home/pi/repos

  # Basic Authentication is repository-wide. It is not secure unless
  # you are using https.  See the 'htpasswd' command to create and
  # manage the password file - and the documentation for the
  # 'auth_basic' and 'authn_fiel' modules, which you will need for this
  # (enable them with 'a2enmod').
  AuthType Basic
  AuthName "Subversion Repository"
  AuthUserFile /etc/apache2/dav_svn.passwd

  # Require a valid account to checkout.
  Require valid-user

</Location>

In nano, hit CTRL X to exit, Y to agree to save, and then push enter to confirm the filename.

Restart Apache:
sudo /etc/init.d/apache2 restart

Then change the permissions of the repository folder:
sudo chown -R www-data:www-data /home/pi/repos

Then create the user:
sudo htpasswd -c /etc/apache2/dav_svn.passwd <username>
where <username> is your login name.

You can navigate to the repository using your web browser.
In my case: 10.0.1.200/svn/gps

(This screenshot was taken after I committed the GPS and Libraries folders in the following steps.)

However, viewing in the web browser isn't very helpful. At this point I went back to my Windows computer. I use TortoiseSVN so I can have a nice GUI to interact with my repos.

I did a checkout of each of the new projects from the Raspberry Pi to my Windows computer.


I copied the latest code of each project into their corresponding new repository, then committed them into the Raspberry Pi.


Unfortunately I lost all my change logs up to that point, but that's ok.

By the way - take a look at the Tortoise Log screenshot above. It has a record of every commit to the repository, who did it, the date, and all the files that have changed. If you double click on one of the files, it shows you all the changes that were made. If you went down a rabbit hole with your code and decided it's a disaster, you can revert back to any prevision revision. If you see a weird change to a file and are wondering who / what / when / why it happened, you can do that by looking at the log! You definitely want to use some kind of version control such as SVN or Git or similar!

4 File Transfer (SFTP)

I want easy file transfer access to my Pi for sharing files / backup purposes. SFTP (SSH File Transfer Protocol) is turn-key once you have SSH going!

Both WinSCP and FileZilla work very well for this purpose.

I created a Pi site with IP address 10.0.1.200


And connected!


Now I can drag files / folders between my workstation and the Pi server. To modify some files I have to log into the Pi as root (or change the folder's permissions).

5 Web Server

Apache was already installed in the SVN steps above, but if you skipped them, then from a terminal window type:
sudo apt-get install apache2

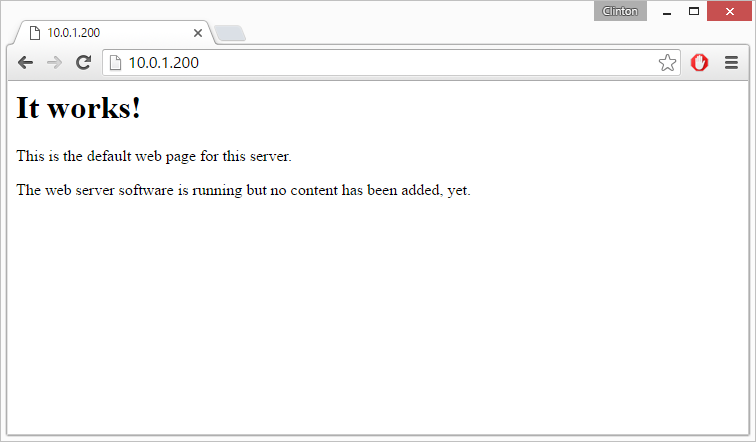
The default folder for the website is /var/www


And when opened in a web browser:

One of my projects will be taking advantage of this web server soon*!

* Soon is a very relative term. ;-)

A few handy functions when dealing with Apache...

To stop Apache (SVN and website):
sudo /etc/init.d/apache2 stop

To start Apache (SVN and website):
sudo /etc/init.d/apache2 start

To restart Apache (SVN and website):
sudo /etc/init.d/apache2 restart


Monday, May 9, 2016

Orbital Aero Model: Indirect Forces

The orbital aero model calculates two forces I'm calling "Indirect" - Gravity and Atmospheric Drag.

Gravity


The force of gravity is dependent on the mass of the two bodies and distance between them. The simulation calculates the influence of gravity from every object to every other object every frame. Not only will satellites be pulled to the Earth, the Earth will be pulled to the satellites!


Fg is the force of gravity, in newtons.
G is the gravitational constant, 6.67408 x 10^-11 in m^3/(kg * s^2).
m1 is one body, in kilograms.
m2 is another body, in kilograms.
r is the distance between the bodies, in meters.

https://en.wikipedia.org/wiki/Gravity

Atmospheric Drag


Some bodies have an atmosphere modeled around them. For any body within the atmosphere of another body, the drag force is calculated and applied.


Fd is the force of drag, in newtons.
rho is the density of the fluid, in kg / m^3.
A is the drag reference area, in m^2.
Cd is the coefficient of drag, which is unitless.
v is the velocity relative to the object, in m/s.

https://en.wikipedia.org/wiki/Drag_(physics)

Orbital Aero Code - update()


To recap from a previous post, there is an update() function in the OrbitalAeroModel class:

// Primary function to process the physics and kinematics all bodies.
bool OrbitalAeroModel::update(double timeStep_seconds)
{
 // It's important all forces are calculated before all positions are updated before all collisions
 // are checked, etc. That way the order in which bodies are looped through does not affect how they
 // affect other bodies in space.

 // First calculate indirect forces, such as those from gravity and atmospheric drag.
 // Currently includes the thrust of engines, but that may be separated eventually.
 processIndirectForces();

 // Next add frictional forces.
 // This must be done after gravity/atmospheric forces to know the normal force for friction.
 processDirectForces();

 // Can now translate and rotate each body.
 processKinematics(timeStep_seconds);

 // After moving the body, check for collisions and adjust positions/velocities as appropriate.
 processCollisions(timeStep_seconds);

 return true;
}


Orbital Aero Code - processIndirectForces()


// Function to loop through all bodies and calculate indirect forces from the gravity
// and atmosphere of other bodies.
bool OrbitalAeroModel::processIndirectForces()
{
// Loop through all bodies and calculate their forces upon each other.

// The outer loop is for the primary body that we're calculating forces for.
map <uint64, BodyModel>::iterator iteratorPrimaryBody = tableBodies.begin();
while (iteratorPrimaryBody != tableBodies.end())
{
BodyModel &primaryBody = iteratorPrimaryBody->second;

// Only process the primary body if it's active.
if (primaryBody.active)
{
// Create a vector to contain the sum of all forces.
Vector sumForces_newtons;

// Start with the thrust force of any onboard engines.
sumForces_newtons = primaryBody.forceThrust_newtons;

// The inner loop is for all other bodies that influence the primary.
map <uint64, BodyModel>::iterator iteratorSecondaryBody = tableBodies.begin();
while (iteratorSecondaryBody != tableBodies.end())
{
BodyModel &secondaryBody = iteratorSecondaryBody->second;

// Only contribute the secondary body's influence if it's active and not the primary body.
if (secondaryBody.active && (&primaryBody != &secondaryBody))
{
// Get the relative distance between the two bodies.
Vector relativeDistance_meters = primaryBody.location_meters - secondaryBody.location_meters;
double relativeDistanceMagnitude_meters = relativeDistance_meters.magnitude();

if (relativeDistanceMagnitude_meters > 0.0)
{
// Calculate the force of gravity.
// Fg = GMm/r^2
// G = Gravitational Constant
// M = Mass of first body
// m = Mass of second body
// r = Distance between bodies
double secondayGravitationalForce_newtons = Constants::gravitationalConstant_meters3PerKilogramSecond2 * (primaryBody.massTotal_kilograms() * secondaryBody.massTotal_kilograms()) / 
relativeDistanceMagnitude_meters / relativeDistanceMagnitude_meters;

// Add passive body gravitational influence to the total force.
sumForces_newtons += -relativeDistance_meters.unit() * secondayGravitationalForce_newtons;

// Are we within the atmosphere of the secondary body?
double altitudeMSL_meters = relativeDistanceMagnitude_meters - secondaryBody.radius_meters;
if (altitudeMSL_meters < secondaryBody.atmosphereMaximumAltitudeMSL_meters())
{
// Get the air density at our current altitude.
double atmosphereDensityMSL_kilogramsPerMeter3 = secondaryBody.getAtmosphereDensityMSL_kilogramsPerMeter3(altitudeMSL_meters);

// Calculate and add passive body atmospheric forces. (Should implement 3-D drag & area.)
// Fd = 0.5 * rho * A * Cd * v * v
// rho = Density of Fluid
// Cd = Coefficient of Drag
// A = Reference Area
// v = Relative velocity through fluid
Vector relativeVelocity_metersPerSecond = primaryBody.velocity_metersPerSecond - secondaryBody.velocity_metersPerSecond;
sumForces_newtons += -relativeVelocity_metersPerSecond.sign() * relativeVelocity_metersPerSecond * relativeVelocity_metersPerSecond * 0.5 * atmosphereDensityMSL_kilogramsPerMeter3 * primaryBody.dragCoefficient * primaryBody.dragReferenceArea_meters2;
}
} // relativeDistanceMagnitude_meters > 0.0

} // ((secondaryBody.active) && (primaryBody.index != secondaryBody.index))
iteratorSecondaryBody++;
} // (iteratorSecondaryBody != tableBodies.end())
primaryBody.forceIndirect_newtons = sumForces_newtons;
} // (primaryBody.active)
iteratorPrimaryBody++;
} // (iteratorPrimaryBody != tableBodies.end())
return true;
}

Results


A couple screenshots from the simulation...


The moon satellite is orbiting the moon while the moon is orbiting the Earth. The smaller satellites are contributing gravitational effects on the planet and moon, but their influence is so small they do practically nothing.


The two satellites closest to the Earth are within the atmosphere and are influenced by atmospheric drag. The lower the altitude, the higher the air density, and thus the higher drag force.

The code as-is supports the concept of a terminal velocity. A body dropped to another body with an atmosphere will stop accelerating when its force of gravity equals the force of drag.

Copyright (c) 2016 Clinton Kam
Permission is hereby granted, free of charge, to any person obtaining a copy of this software and associated documentation files (the "Software"), to deal in the Software without restriction, including without limitation the rights to use, copy, modify, merge, publish, distribute, sublicense, and/or sell copies of the Software, and to permit persons to whom the Software is furnished to do so, subject to the following conditions:
The above copyright notice and this permission notice shall be included in all copies or substantial portions of the Software.
THE SOFTWARE IS PROVIDED "AS IS", WITHOUT WARRANTY OF ANY KIND, EXPRESS OR IMPLIED, INCLUDING BUT NOT LIMITED TO THE WARRANTIES OF MERCHANTABILITY, FITNESS FOR A PARTICULAR PURPOSE AND NONINFRINGEMENT. IN NO EVENT SHALL THE AUTHORS OR COPYRIGHT HOLDERS BE LIABLE FOR ANY CLAIM, DAMAGES OR OTHER LIABILITY, WHETHER IN AN ACTION OF CONTRACT, TORT OR OTHERWISE, ARISING FROM, OUT OF OR IN CONNECTION WITH THE SOFTWARE OR THE USE OR OTHER DEALINGS IN THE SOFTWARE.

Tuesday, April 12, 2016

Office / Shop: Intro

The family has finished moving! (Well, I guess? We're still far from being fully unpacked.) Whereas our last house was deep in suburbia, the new place is on a nice piece of property perfect for projects! Including a 24'x36' shop!


It's essentially three 12'x24' bays with two large sliding doors (no idea what happened to the third). I'm going to wall off the left-most bay, add windows and a door, and make that my office. The middle and right bays will be for the wood working tools, Spitfire, and ping-pong table.

The building once had power, but someone has snipped the main cable going to it. I got an estimate for running new lines from the house to the shop but attempting all solar will be far more interesting. Especially considering panels are under $1/Watt now! We're in Washington state (on the west side), so I think publishing stats on how much solar panels differ from their rated values in cloudy weather will be very beneficial to others. (I know I was looking for that data!) The goal will be to have a large enough solar array to supply all the needs of the office, shop, and electric cars!

But first I need to get an office walled up!


The wall consists of a treated 2x4 base plate, 2x4 studs, and 2- 2x4 upper plates. For those not familiar with lumber, a 2x4 is actually 1 1/2" x 3 1/2".

The treated wood for the base is necessary as it will be in direct contact with concrete (and thus ground moisture).

I wanted as high of ceilings as possible. The studs are 10' boards cut back 1'-4 1/2" = 8'-7 1/2"

Why 8'-7 1/2"?

8'-7 1/2" + 1 1/2" bottom plate + 1 1/2" first top plate + 1 1/2" second top plate = 9'-0" wall height

The double upper plate helps distribute the load from the (future) ceiling joists.


The 9'-0" height still gives me enough room above the new wall for ceiling joists.


Look closely and you can see the Spitfire under the pile of trash (er, important household goods).

I haven't completed tying in the new wall to the existing structure, but it is at least standing up on its own. Some portions of the existing exterior walls have rotted, so repairs are needed in addition to this new construction.

By the way, I'm not a professional structural engineer. Do what your local codes require, not what a guy on the Internet did. :-)


Monday, February 29, 2016

Orbital Aero Model: Body Model & Orbital Aero Model Classes

Things have been mighty busy the past month - purchasing a house across the country, prepping our current home to sell, and everything else involved with moving. On the plus side the new property has a 24x36 shop that (after some renovations) will become an excellent project space. It doesn't have electricity yet, but I'm looking forward to building a solar panel array for power.

I have a goal of at least one post per month, but I haven't had much time to devote to my projects lately (not to mention most of my tools are packed in moving boxes). So for now I'm going to jump back to the Orbital Aero Model where the posts are way behind the actual coding. Watching SpaceX land rockets and reading The Martian are good motivators as well!

TypeDefinitions.h


Defining a variable as "unsigned long long" throughout the code would be pretty awful, so I keep around a bunch of type definitions in my projects so it's easier for me to track. Nothing too amazing here, but you would need these typedefs to compile my code!

#pragma once

typedef char int8;
typedef unsigned char uint8;
typedef short int16;
typedef unsigned short uint16;
typedef int int32;
typedef unsigned int uint32;
typedef unsigned long long uint64;
typedef float float32;
typedef double double64;

Body Model


I've already gone over the VectorModel which will aid in the math routines. Next up is the BodyModel which is the basis for each simulated entity.

BodyModel.h


#pragma once

#include "math.h"
#include "TypeDefinitions.h"
#include "VectorModel.h"

class BodyModel
{
public:
BodyModel(void);
~BodyModel(void);

uint64 index; // Unique identification of this body.
bool stationary; // Whether or not this body can move in space.
bool active; // Whether or not this body is to be included in calculations.


Vector forceDirect_newtons;
Vector forceIndirect_newtons;
Vector forceTotal_newtons();

Vector location_meters;
Vector velocity_metersPerSecond;
Vector acceleration_metersPerSecond2;

double massBase_kilograms;
double massTotal_kilograms();

// 3-D shape for collision detection
double radius_meters;

// 3-D Coefficient of Drag
double dragReferenceArea_meters2;
double dragCoefficient;

// Atmosphere
int atmosphereDensityCount;
double atmosphereDensityInterval_meters;
double atmosphereMaximumAltitudeMSL_meters();
double atmosphereDensityMSL_kilogramsPerMeter3[120];
double getAtmosphereDensityMSL_kilogramsPerMeter3(double altitudeMSL_meters);

private:
};

The index variable is the unique identification of the body; no two bodies will share the same index. When forces are calculated, they are stored in the 2 force vectors: forceDirect and forceIndirect. The location, velocity, and acceleration are referenced from an arbitrary static location in the world - not any particular body in space (such as the Earth or Sun). The other fields keep track of the physical properties of the body so the physics interactions between bodies can be calculated.

BodyModel.cpp


And the function calls for that class...

#include "BodyModel.h"

// Body Constructor BodyModel::BodyModel(void)
{
this->stationary = false;
this->active = false;

this->radius_meters = 0.0;

this->atmosphereDensityCount = 0;
this->atmosphereDensityInterval_meters = 0.0;
this->atmosphereDensityMSL_kilogramsPerMeter3[0] = 0.0;

this->location_meters = 0.0;
this->velocity_metersPerSecond = 0.0;
this->acceleration_metersPerSecond2 = 0.0;

this->massBase_kilograms = 0.0;

this->dragReferenceArea_meters2 = 0.0;
this->dragCoefficient = 0.0;

return;
}

// Body Destructor BodyModel::~BodyModel(void)
{
return;
}

// Return the total force acting on the body.
Vector BodyModel::forceTotal_newtons()
{
return (this->forceIndirect_newtons + this->forceDirect_newtons);
}

// Return the total mass of the body.
double BodyModel::massTotal_kilograms()
{
return massBase_kilograms; // + fuel/payload/etc masses
}

// Get the highest altitude with significant atmosphere for this body. double BodyModel::atmosphereMaximumAltitudeMSL_meters()
{
return (double)(atmosphereDensityCount - 1) * atmosphereDensityInterval_meters;
}

// Get the atmospheric density for an altitude relative to this body. double BodyModel::getAtmosphereDensityMSL_kilogramsPerMeter3(double altitudeMSL_meters)
{
if (atmosphereDensityInterval_meters > 0.0 && altitudeMSL_meters >= 0.0)
{
// Interpolate
int altitudeIndex = (int)floor(altitudeMSL_meters / atmosphereDensityInterval_meters);
if (altitudeIndex < atmosphereDensityCount)
{
return atmosphereDensityMSL_kilogramsPerMeter3[altitudeIndex];
}
}
return 0.0;
}

Orbital Aero Model


The OrbitalAeroModel manages the physics and kinematics of all the bodies; expect this class to be majorly overhauled as the software progresses.

Of note:

  • A single "OrbtialAeroModel" class is created that hosts the entire simulation.
  • Public functions from the class are available to create bodies, remove bodies, update properties of bodies, and propogate the simulation.
  • Private functions within the class handle the physics and kinematics of the simulation as well as entity record keeping.
  • Each body has a unique 64-bit unsigned integer for identification. 18,446,744,073,709,551,616 entities should be enough ;-)


OrbitalAeroModel.h


using std::map;

class OrbitalAeroModel
{
public:
OrbitalAeroModel(void);
~OrbitalAeroModel(void);

// Body Management
uint64 createBody();
bool removeBody(uint64 index);
BodyModel &OrbitalAeroModel::getBody(uint64 index);

// Primary Update for Simulation Processing
bool update(double timeStep_seconds);

private:
// Counter to ensure unique identifications for bodies.
uint64 indexCounter;

// Table to hold all the bodies.
map <uint64, BodyModel> tableBodies;

// Specific Physics Processing
bool processIndirectForces();
bool processDirectForces();
bool processKinematics(double timeStep_seconds);
bool processCollisions(double timeStep_seconds);

// Table Management
bool doesBodyExistInTable(uint64 index);
BodyModel &getBodyFromBodiesTable(uint64 index);
bool updateBodyInBodiesTable(uint64 index, BodyModel bodyObject);
bool removeBodyFromBodiesTable(uint64 index);
bool clearBodiesTable();
};

Before I dive into the processing of the bodies, let's briefly cover the management of them.

The header defines a tableBodies which holds all bodies in the simulation. The key of the table is the unique 64-bit unsigned integer of the body, and the value of the table is a BodyModel containing all the body's data.

Tables.cpp


5 private helper functions handle the table record keeping:

// Return whether or not a given body exists in the simulation.
bool OrbitalAeroModel::doesBodyExistInTable(uint64 index)
{
// Search through the table for a given index.
if (tableBodies.find(index) != tableBodies.end())
{
// Record found, return true.
return true;
}
else
{
// Record not found, return false.
return false;
}
}

// Get a reference to a body from its unique ID.
BodyModel &OrbitalAeroModel::getBodyFromBodiesTable(uint64 index)
{
// Define an iterator to store values from the record table.
map <uint64, BodyModel>::iterator iteratorBodyObject;

// Search through the table for a given index and store in the iterator.
iteratorBodyObject = tableBodies.find(index);

// Return value portion (the record) of the table iterator.
return iteratorBodyObject->second;
}

// Update a body into the simulation.
bool OrbitalAeroModel::updateBodyInBodiesTable(uint64 index, BodyModel bodyObject)
{
// Update the table with the given record.
tableBodies[index] = bodyObject;
return true;
}

// Remove a body from the simulation.
bool OrbitalAeroModel::removeBodyFromBodiesTable(uint64 index)
{
// Remove the given index from the table.
tableBodies.erase(index);

return true;
}

// Clear all bodies in the simulation.
bool OrbitalAeroModel::clearBodiesTable()
{
// Clear the table.
tableBodies.clear();

return true;
}

OrbitalAeroModel.cpp


3 public functions gives access to the bodies:

// Create a new body to act in the simulation.
uint64 OrbitalAeroModel::createBody()
{
BodyModel thisBody;
indexCounter ++;
thisBody.index = indexCounter;
thisBody.active = true;
updateBodyInBodiesTable(thisBody.index, thisBody);
return thisBody.index;
}

// Remove a body from the simulation.
bool OrbitalAeroModel::removeBody(uint64 index)
{
if (doesBodyExistInTable(index))
{
return removeBodyFromBodiesTable(index);
}
return false;
}

// Get a simulation body.
BodyModel &OrbitalAeroModel::getBody(uint64 index)
{
return getBodyFromBodiesTable(index);
}

A single update function is called to do all processing of bodies within the simulation. A time step is passed in so it knows how far to propagate the entities. The shorter the time step the closer the simulation will match reality, but it also means it's more computational intensive.

// Primary function to process the physics and kinematics all bodies.
bool OrbitalAeroModel::update(double timeStep_seconds)
{
// It's important all forces are calculated before all positions are updated before all collisions
// are checked, etc. That way the order in which bodies are looped through does not affect how they
// affect other bodies in space.

// First calculate indirect forces, such as those from gravity and atmospheric drag.
// Currently includes the thrust of engines, but that may be separated eventually.
processIndirectForces();

// Next add frictional forces.
// This must be done after gravity/atmospheric forces to know the normal force for friction.
processDirectForces();

// Can now translate and rotate each body.
processKinematics(timeStep_seconds);

// After moving the body, check for collisions and adjust positions/velocities as appropriate.
processCollisions(timeStep_seconds);

return true;
}


Each of those process functions perform the actual physics on the bodies. Rather than try to cover them all in this post, I'll devote individual posts to each one.

To cover everything there is on the record management side, I will show how each of those process functions loops through bodies:

bool OrbitalAeroModel::process######()
{
map <uint64, BodyModel>::iterator iteratorPrimaryBody = tableBodies.begin();
while (iteratorPrimaryBody != tableBodies.end())
{
BodyModel &primaryBody = iteratorPrimaryBody->second;
if (primaryBody.active)
{
map <uint64, BodyModel>::iterator iteratorSecondaryBody = iteratorPrimaryBody;
iteratorSecondaryBody++;
while (iteratorSecondaryBody != tableBodies.end())
{
BodyModel &secondaryBody = iteratorSecondaryBody->second;
if (secondaryBody.active && (&primaryBody != &secondaryBody))
{

// Do some math!

} // ((secondaryBody.active) && (primaryBody.index != secondaryBody.index))
iteratorSecondaryBody++;
} // (iteratorSecondaryBody != tableBodies.end())
} // (primaryBody.active)
iteratorPrimaryBody++;
} // (iteratorPrimaryBody != tableBodies.end())
return true;
}

Sunday, January 10, 2016

Dynamic Board: 3x3 Prototype Blocks

I love some of the new Virtual Reality / Augmented Reality devices coming out (especially CastAR). A couple limitations with the approaches I've seen though is you can't physically touch the environment (video only) and they all require some type of goggles to be worn.

I'm sure there are products in development for special haptic gloves you could wear to simulate touch sensations, but can I build something where the real physical touch is built in? I'd like for the 3-D shape to physically emerge out of the table. In fact there have been a couple movies recently of this in action. If I can find some pictures of those, I'll update this post later with them.

All of my work so far on the servo controller has built up to this goal. Basically I want to make a table top of blocks arranged in a grid pattern that can be individually extruded a controlled distance from the surface. Each block also needs to have its color/image changeable and have some type of touch input. A computer controls the distance of the extrusion, the color/image on the block, and what to do when touch input is detected. (For any patent lovers out there, please consider the ideas in this post public domain prior art.)

To really be useful, I think it needs to have a resolution of 8x8 (Checkers/Chessboard), but I'm starting with a 3x3 prototype - just enough to play Tic Tac Toe.

I'm testing out 3 different block shapes: no taper, low taper, and high taper. If I use an overhead projection to put an image onto the blocks, then the taper will allow me to project images on the sides. I like how the "no taper" will sit flush with the table when fully down though. A collapsible block would probably be best, but that complicates things more than I'd like.


You can see how the low / no taper blocks became unstable near the end of the print and came out rough. I'm going to clean those up later.

Each block has a mount at the bottom that I can tie the servo to.


I then printed the block mount that will sit on top of my servos mount.


That print alone took 15 hours; I was so glad it came out flawless on the first try!

The blocks within the block mount on top of the servo mount...


And a side shot to see the servos beneath...


This is just a progress report. I need to actually move the block mount higher so the servos arms can clear the mount and have plenty of throw. When complete, the servos should be able to go from fully extended to fully flush with the table top.

Not including failed prints, that was 68 hours of 3-D printing!

Monday, December 21, 2015

Spaceship Control Panel

My family went up to Washington State on vacation, and while there we went to a children's museum. They had a mock police car, fire truck, ambulance, and helicopter that kids could go in and play with the many controls. Some switches would turn lights on and off, others would play sounds. My son absolutely loved it. He needed one of his own. I made a big order off Adafruit the next day.

And what better thing to build than a spaceship control panel?

I want to create it such that it can be expanded in the future as he gets older. Then instead of just toggling lights and playing canned sounds, he would actually have to follow certain procedures to make things happen.

It's nowhere near this guy's creation:
https://www.raspberrypi.org/blog/mission-control-desk/
http://makezine.com/2014/06/26/making-fun-kids-room-spacecraft/
But it's sufficient for my son now, and it will get better. :-)

For this first iteration I won't get too complicated. I'll have a variety of inputs that control lights and sounds. I actually put a lot of time into which buttons and switches to have. The Apollo sim I linked to above it awesome, but I want my son to be able to replicate future space travel among the stars ("Foundation" style). So the controls I ultimately went with could be used for privateers smuggling cargo across the Confederation, battling Romulans near the neutral zone, or searching for the mythical planet Earth. At this point the buttons will repeat the same sounds every time you push them, but when my son gets older I can tie in a microcontroller to put more logic in the responses.


The Components

1 - 2'x2' 1/4" Birch Sheet (Lowes)
3 - Power On/Off Switch (Radio Shack)
2 - Red Toggle Button (Radio Shack)
2 - Protected Switch (Radio Shack)
9 - SPST 5VDC Reed Relay (Radio Shack)
6 - 16mm Illuminated Pushbutton - Red Momentary (Adafruit)
11 - Diffused White 10mm LED (Adafruit)
1 - LED Illuminated Pushbutton - 30mm Round (Adafruit)
1 - Audio FX Sound Board - WAV/OGG Trigger with 16MB Flash (Adafruit)
1 - USB Powered Speakers (Adafruit)
1 - 5V 2A (2000mA) switching power supply (Adafruit)
1 - Breadboard-friendly 2.1mm DC barrel jack (Adafruit)
1 - 5V 2A Switching Power Supply w/ USB-A Connector (Adafruit)
1 - Kindle Fire (Amazon)
1 - IKEA Side Table (IKEA)
Lots of 22 Gauge Solid Core Wire & Resistors

The Build


Measure and drill some holes... I also cut a large opening for the tablet screen...


Painted white with the controls mounted...


A spare IKEA side table was a quick way to give it a stable base.


Wiring it up...


(Yeah I know the wires are a mess. There is plenty of slack to get them tidied up, but the time to do so is limited.)


Final Product


I found a 3-D space program on the Kindle that is absolutely perfect for the control panel.

The primary and emergency light switches currently just toggle their white LEDs, but eventually I'll have them control 120V external lighting. (I've got some relays that can close a 120V A/C circuit with just 3V.)

The shield, cargo bay, and tractor beam switches toggle their corresponding white LEDs and close a relay for the Audio FX board to play an appropriate sound.

The Visual Scanner, Radar Scanner, Initiate Takeoff, and Initiate Landing buttons are all momentary buttons. While pressed, the white LED illuminates and the Audio FX board plays an appropriate sound. When released the LED extinguishes.

The weapon systems are probably the most complicated. The red momentary buttons are only illuminated (and functional) if the protected arming switches are raised. Pressing them causes some nice launch effects to be played.

The Initiate Warp Speed button is always illuminated, but it plays a nice sound effect when pressed.


There is always room for improvement, but for now my son is happy and occupied for a little longer each day! :-)

Thursday, November 12, 2015

Halloween 2015

There is decent progress on the servo controller, but this past month has been crazy busy. I've drawn up some designs in Blender that I need to 3-D print. The new parts include the upper frame of the controller and blocks the servos will manipulate.

In the mean time, another short term project popped up as a nice distraction. My son's first Halloween was coming up (technically second, but he was a bit young for the first), and he needed a costume. There's nothing better than a spaceship, so my wife and I built one...

The skeleton was built with PVC.


Some cardboard spray painted silver made up the skin.


My son is too young to hold a bag for candy, so my wife came up with the idea of a compartment under the hood of the spacecraft to be his candy bag. We cut a simple L shaped lever out of some plywood, drilled a pivot hole in the center of the lever, drilled a second hole for a string at the end of the lower leg, and mounted it underneath the hood.

The lever pivots freely about its center. We tied a string through the lower leg, brought it forward (wrapping it around the front frame), then funneled it back to the rear of the spacecraft. Now we can pull the string in the back and it forces the hood up!


No spacecraft is complete without lights, so we picked up 2 white LEDs for the front, a red LED for the left, and a green LED for the right. A little bit of soldering and the we were in business. (Not the best wiring job, but it only needed to last one night.)


Spacesuit is a requirement (he kept that helmet on just long enough to take this picture, then it was gone).


Ready to go Trick or Treating! (My wife made an outfit just for pushing around the spacecraft - she's the "flames" coming out the back.)


FYI - the name of the ship is "Far Star". Give yourself +10 geek points if you know the reference.

The bar has been set... what will we do next year?