Thursday, August 18, 2016

Pebble Game: 2 Steps RPG

I've had an itch to create a role playing game on my Pebble watch for a while now. There are several RPGs available for the watch (some quite nice), but overall I think they tried to shoehorn a game meant to be played on a computer platform (with the vast input devices available) into a watch with 4 buttons.

I wanted the game to embrace the watch platform and be designed specifically for it.

My design methodology:

  • Movement in the game should be forward or back. In RPGs, you're really just going to a quest goal (with more danger) or coming back home (to train/rest/etc). Unless you're trying to replicate a maze, there's no need to be able to turn left or right. So I threw out the ability to turn! Now I only need 2 buttons for the entire movement system: "forward" and "back".
  • As you're heading towards your quest goal, you'll encounter enemies along the way that will block your path. When blocked there is no need for a "forward" action, so we'll just replace that with an "attack". Not only does this double up buttons on our very limited user-interface, it also allows the player to plow through easier enemies without moving their fingers over. Just keep pressing the same button and you'll either move forward or kill what's in front of you then move forward.
  • The same is true for the reverse movement. If you encounter an enemy too difficult, then you want to go back. To not make the game too easy, once you're in combat you can't just walk away without consequences; you have to attempt to flee which could result in getting hurt. So the "back" action gets replaced with a "flee". Again if you just want to go home, you can keep pressing the same button and you'll either move back or flee the combat to move back without moving your fingers over. That doubles up another button on the user interface.
  • It bugs me when there are killer squirrels in RPGs that chase you down and gnaw at your ankles until you collapse and die. In reality if you're trying to kill a squirrel then decide to walk away and ignore him, the squirrel is more than happy to let you walk away. So some monsters require you to attempt to "flee" from combat while others allow you to just "ignore" them. "Ignore" is 100% successful, and the monster doesn't try to take one last bite out of you as you walk away.
  • Pretty much any RPG is going to have some kind of economy. The player goes out, kills a rabbit, then sells its fur for a little cash. The player goes out, kills a skeleton, then sells the sword it was carrying for cash. But it's all the same - kill, put in inventory, go back to town, sell for money. We'll cut out the middle steps - when you kill something we'll just give you the money as though you instantly sold it. You can't use the cash until you go back to town anyways, so what does it matter that you go back to town with 10 rabbit furs or $10? I didn't implement encumbrance, but it could be simulated by putting a cap on how much gold you carry at any one time.
  • Being a watch app, it needs to be very quick and easy for the player to leave the game. With only a single exception (that I'll cover next), the back button on the Pebble watch needs to immediately exit the game and go back to the watchface. Done playing this session? Hit one button and you're out!
  • The majority of the game is on a single screen, but there are a handful of major events that require a fair amount of text so the player knows what is going on. On those screens, the up/down/select buttons on the watch do nothing - the player must press "back". This ensures the player won't accidentally skip an important conversation while they're plowing to or fleeing from enemies. So the conversation window comes up, read it, press "back", and you're back in the game. Accidentally double press "back" and go to the watchface? No problem! Just jump back in the game right where you left off, which leads to my next point.
  • This is a game on a watch - people aren't going to stare at this tiny screen for 30 minutes. They're going to play in very small doses at sporadic times of opportunity. It must be seamless to leave the game and go back in right where they left off. Upon exiting, the game automatically saves the entire state (game settings, player properties, and current enemy properties). Upon startup, the game automatically loads the entire state - including if you're in the middle of combat.
  • So that leaves 1 button, "select". To be most valuable, it needs to be context sensitive. If you're in the Inn then likely you want to heal up, so we'll make that button "rest". If you're at the trainer then likely you want to train, so we'll make that button "train". If you're in (or just out of) combat then likely you want to regenerate your health, so we'll make that button "cast heal". The first cut of the game only supports the one spell "cast heal". I can see future versions of the game having a variety of spells or equipment items that would be accessed under the "select" button (which would bring up a list to pick from). That will mean a few extra button presses for those special actions, but it won't be something the player constantly has to do.
  • Although the user interface is straightforward, game actions are always labeled next to the buttons. For one thing, users don't read manuals. If they have to read a manual to play a little game on their watch then they won't play it (and I can't blame them). Tutorials that teach them the controls the first time they play aren't good either. What happens when you stop playing for 3 weeks? You forget all your controls and you're not going through the tutorial all over again.
  • Finally, I wanted the Pebble watch to have a game you could beat. Most Pebble games I played just had you maximize your score then try again, but that's not as satisfying as being able to say I BEAT this game. The game as designed has some replayability - when you win it tells you how many moves it took (and records your fewest moves) so you could try and win again in even fewer moves. Or you could try beating it by training only attack or training only defense or never training anything or never dying. If I make a version 2, I'll include more spells so you could try winning as a spell caster or fighter or combination of the two.


A poster on the Pebble discussion board offered a great name for the game that I'm using "2 Steps". As in you're going to be doing a lot of 2 steps forward only to go 1 step back.

Screenshot time!

Game Intro

Inn to Rest

Defense Trainer

In Combat


I still only have the original black and white Pebble; a color Pebble will give me lots more options on the user interface. The next version of the game will likely take advantage of color to consolidate status bars, have a background color scheme relevant to the area you're in, and just be prettier in general. (I've already been asked to add images for each of the creatures.) The name of the sequel is too obvious to not use "2 Steps: Beyond the Gate". ;-)

I plan on releasing the source code after I get time to more thoroughly document it. Stay tuned for that post.

UPDATE: Code published to: http://clintkprojects.blogspot.com/2016/10/pebble-game-2-steps-rpg-source-code.html

Sunday, July 17, 2016

Office / Shop: Exterior Wall

The exterior wall is complete! I'm not a fan of toothpaste blue, so I'll eventually repaint the entire building. In the mean time though it is water tight and secure!

Frame...


Plywood...


Wrap...


Door...


Siding (metal roofing)...


Sunday, June 26, 2016

Orbital Aero Model: Collisions


In addition to gravity pulling bodies together, atmospheric drag affecting bodies near each other, and friction for bodies in contact, I wanted to accurately model the impact of bodies - collisions.

There are 3 types of collisions:

Elastic - Partial bounce (some stick). The degree of elasticity is called the coefficient of restitution, a value between 0.0 and 1.0. The higher the coefficient, the more the bounce.

Perfectly Elastic - No loss of kinetic energy, perfect bounce. The coefficient of restitution is 1.0. In reality there are no perfectly elastic collisions but billiard balls impacting are a rough real world example.

Perfectly Inelastic (Plastic) - Bodies stick together upon impact. The coefficient of restitution is 0.0.


Ua = Primary Body Approach Speed
Ub = Secondary Body Approach Speed
Ma = Primary Body Mass
Mb = Secondary Body Mass
Cr = Coefficient of Restitution, 0 = Inelastic, 1 = Elastic
Va = Primary Body Departure Speed
Vb = Secondary Body Departure Speed

https://en.wikipedia.org/wiki/Collision
https://en.wikipedia.org/wiki/Elastic_collision
https://en.wikipedia.org/wiki/Inelastic_collision
https://en.wikipedia.org/wiki/Coefficient_of_restitution

Orbital Aero Code - update()


A refresher of our update() function in the OrbitalAeroModel class.

// Primary function to process the physics and kinematics all bodies.
bool OrbitalAeroModel::update(double timeStep_seconds)
{
 // It's important all forces are calculated before all positions are updated before all collisions
 // are checked, etc. That way the order in which bodies are looped through does not affect how they
 // affect other bodies in space.

 // Calculate Motor Thrust (From control system and motor abilities.)

 // Sum all the forces acting on every body, including forces from thrust, gravity, atmospheric drag,
 // and friction.
 processForces();

 // Can now translate and rotate each body.
 processKinematics(timeStep_seconds);

 // After moving the body, check for collisions and adjust positions/velocities as appropriate.
 processCollisions(timeStep_seconds);

 return true;
}

Orbital Aero Code - processCollisions()


// Handle collisions between bodies.
bool OrbitalAeroModel::processCollisions(double timeStep_seconds)
{
 // Loop through all bodies and check for collisions.
 // Unlike the forces calculations, not every body needs to be run through in the secondary loop.
 // For example, if you have 4 bodies, the following loops will process as follows:
 // Primary 1  Secondary 2
 // Primary 1  Secondary 3
 // Primary 1  Secondary 4
 // Primary 2  Secondary 3
 // Primary 2  Secondary 4
 // Primary 3  Secondary 4

 // Primary loop is through all bodies.
 map <uint64, BodyModel>::iterator iteratorPrimaryBody = tableBodies.begin();
 while (iteratorPrimaryBody != tableBodies.end())
 {
  BodyModel &primaryBody = iteratorPrimaryBody->second;
  if (primaryBody.active)
  {
   // Secondary loop begins one after the primary body iterator.
   map <uint64, BodyModel>::iterator iteratorSecondaryBody = iteratorPrimaryBody;
   iteratorSecondaryBody++;

   // Continue the secondary loop to the end of the bodies list.
   while (iteratorSecondaryBody != tableBodies.end())
   {
    BodyModel &secondaryBody = iteratorSecondaryBody->second;
    if (secondaryBody.active && (&primaryBody != &secondaryBody))
    {
     // Calculate the distance betweeen bodies.
     Vector relativeDistance_meters = secondaryBody.location_meters - primaryBody.location_meters;
     double relativeDistanceMagnitude_meters = relativeDistance_meters.magnitude();

     double combinedRadii_meters = primaryBody.radius_meters + secondaryBody.radius_meters;

     // Do the bodies occupy the same space?
     if (relativeDistanceMagnitude_meters < combinedRadii_meters && relativeDistanceMagnitude_meters > 0)
     {
      // Potential impact. Get elevation at that location (convert to geodetic).
      // Not loading terrain yet, just do the impact.
      // Coefficient of Restitution
      // 0 = Perfectly Plastic, objects remain together
      // 1 = Perfectly Elastic, kinetic energy conserved / bounce
      double Cr = 0.5;

      //  Primary body impacting secondary body.
      //                 
      //    Approach-->  \   |
      //                  \  |
      //                   \ | <-- Surface
      //    Normal--> /_____\|
      //              \     /|
      //                   / |
      //                  /  |
      //   Departure--> |/_  |
      //

      // Take the dot product of the velocity vector with the normal surface to get the magnitude of the impact speed.
      Vector vectorNormalToImpact = -relativeDistance_meters.unit();
      double primaryBodyPerpendicularApproachSpeed_metersPerSecond = Vector::dotProduct(primaryBody.velocity_metersPerSecond, vectorNormalToImpact);
      double secondaryBodyPerpendicularApproachSpeed_metersPerSecond = Vector::dotProduct(secondaryBody.velocity_metersPerSecond, vectorNormalToImpact);

      // Determine departure speeds based on coefficient of restitution, perpendicular speeds, and masses.
      // Va = (Ma * Ua + Mb * Ub + Mb * Cr * (Ub - Ua)) / (Ma + Mb)
      // Vb = (Ma * Ua + Mb * Ub + Ma * Cr * (Ua - Ub)) / (Ma + Mb)
      // Ua = Primary Body Approach Speed
      // Ub = Secondary Body Approach Speed
      // Ma = Primary Body Mass
      // Mb = Secondary Body Mass
      // Cr = Coefficient of Restitution, 0 = Inelastic, 1 = Elastic
      // Va = Primary Body Departure Speed
      // Vb = Secondary Body Departure Speed

      double primaryBodyPerpendicularDepartureSpeed_metersPerSecond = 
       (primaryBody.massTotal_kilograms() * primaryBodyPerpendicularApproachSpeed_metersPerSecond +
        secondaryBody.massTotal_kilograms() * secondaryBodyPerpendicularApproachSpeed_metersPerSecond +
        secondaryBody.massTotal_kilograms() * Cr * (secondaryBodyPerpendicularApproachSpeed_metersPerSecond - primaryBodyPerpendicularApproachSpeed_metersPerSecond)) /
       (primaryBody.massTotal_kilograms() + secondaryBody.massTotal_kilograms());

      Vector primaryPerpendicularChange_metersPerSecond = vectorNormalToImpact * (primaryBodyPerpendicularDepartureSpeed_metersPerSecond - primaryBodyPerpendicularApproachSpeed_metersPerSecond);
      primaryBody.velocity_metersPerSecond += primaryPerpendicularChange_metersPerSecond;

      double secondaryBodyPerpendicularDepartureSpeed_metersPerSecond = 
       (primaryBody.massTotal_kilograms() * primaryBodyPerpendicularApproachSpeed_metersPerSecond +
        secondaryBody.massTotal_kilograms() * secondaryBodyPerpendicularApproachSpeed_metersPerSecond +
        primaryBody.massTotal_kilograms() * Cr * (primaryBodyPerpendicularApproachSpeed_metersPerSecond - secondaryBodyPerpendicularApproachSpeed_metersPerSecond)) /
       (primaryBody.massTotal_kilograms() + secondaryBody.massTotal_kilograms());

      Vector secondaryPerpendicularChange_metersPerSecond = vectorNormalToImpact * (secondaryBodyPerpendicularDepartureSpeed_metersPerSecond - secondaryBodyPerpendicularApproachSpeed_metersPerSecond);
      secondaryBody.velocity_metersPerSecond += secondaryPerpendicularChange_metersPerSecond;

      // Reposition the entities based on the "bounce".
      primaryBody.location_meters += primaryBody.velocity_metersPerSecond * timeStep_seconds;
      secondaryBody.location_meters += secondaryBody.velocity_metersPerSecond * timeStep_seconds;

      // Recalculate the distance, ensure we're still not occupying the same space.
      Vector relativeDistanceAfterMovement_meters = secondaryBody.location_meters - primaryBody.location_meters;
      double relativeDistanceAfterMovementMagnitude_meters = relativeDistanceAfterMovement_meters.magnitude();

      if (relativeDistanceAfterMovementMagnitude_meters < combinedRadii_meters)
      {
       // Still occupying the same space, reposition the less dense mass outside.
       Vector unitVectorToIntercept = relativeDistanceAfterMovement_meters.unit();
       if (primaryBody.massBase_kilograms > secondaryBody.massBase_kilograms)
       {
        secondaryBody.location_meters = primaryBody.location_meters + (unitVectorToIntercept * (combinedRadii_meters + 0.01));
       }
       else
       {
        primaryBody.location_meters = secondaryBody.location_meters + (-unitVectorToIntercept * (combinedRadii_meters + 0.01));
       }
      }
     } // (relativeDistanceMagnitude_meters < combinedRadii_meters && relativeDistanceMagnitude_meters > 0)
    } // ((secondaryBody.active) && (primaryBody.index != secondaryBody.index))
    iteratorSecondaryBody++;
   } // (iteratorSecondaryBody != tableBodies.end())
  } // (primaryBody.active)
  iteratorPrimaryBody++;
 } // (iteratorPrimaryBody != tableBodies.end())
 return true;
}

Results


Two bodies impacting with a coefficient of restitution of 1.0


Two bodies impacting with a coefficient of restitution of 0.5


Two bodies impacting with a coefficient of restitution of 0.0


How about a game of billiards?

Ball approaching (slightly off angle)...


After impact...


And finally impacting something with a much higher mass...


Copyright (c) 2016 Clinton Kam
Permission is hereby granted, free of charge, to any person obtaining a copy of this software and associated documentation files (the "Software"), to deal in the Software without restriction, including without limitation the rights to use, copy, modify, merge, publish, distribute, sublicense, and/or sell copies of the Software, and to permit persons to whom the Software is furnished to do so, subject to the following conditions:
The above copyright notice and this permission notice shall be included in all copies or substantial portions of the Software.

THE SOFTWARE IS PROVIDED "AS IS", WITHOUT WARRANTY OF ANY KIND, EXPRESS OR IMPLIED, INCLUDING BUT NOT LIMITED TO THE WARRANTIES OF MERCHANTABILITY, FITNESS FOR A PARTICULAR PURPOSE AND NONINFRINGEMENT. IN NO EVENT SHALL THE AUTHORS OR COPYRIGHT HOLDERS BE LIABLE FOR ANY CLAIM, DAMAGES OR OTHER LIABILITY, WHETHER IN AN ACTION OF CONTRACT, TORT OR OTHERWISE, ARISING FROM, OUT OF OR IN CONNECTION WITH THE SOFTWARE OR THE USE OR OTHER DEALINGS IN THE SOFTWARE.

Tuesday, June 14, 2016

Orbital Aero Model: Kinematics (Translation)

All forces on all bodies have been calculated; it's now time to move them in space.


We'll start with the classic F = ma (Force equals mass times acceleration.)

In our prior function calls, we calculated the total force applied to the body. Since we know its mass, it's easy to calculate acceleration:


F is the force, in newtons.
m is the mass, in kilograms.
a is the acceleration, in meters per second squared.

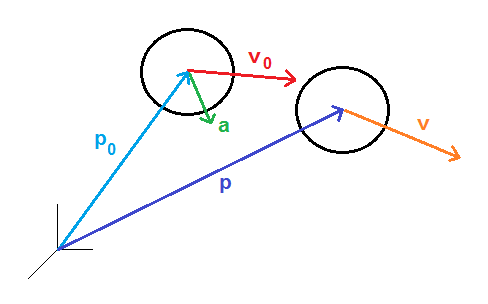
And with the acceleration, we know how to propagate location and velocity:


p is the newly calculated position, in meters.
p0 is the initial position. in meters.
v0 is the initial velocity, in meters per second.
t is the time step of the simulation, in seconds.
a is the acceleration, in meters per second squared..


v is the newly calculated velocity, in meters per second.
v0 is the initial velocity, in meters per second.
a is the acceleration, in meters per second squared.
t is the time step of the simulation, in seconds.

The smaller the time step the more accurate the simulation. However, that also means it's more computational intensive for simulating the same period of time.

Rotation code is still a work in progress so that will have to wait for a future post.

https://en.wikipedia.org/wiki/Kinematics


Orbital Aero Code - update()


A refresher of our update() function in the OrbitalAeroModel class.

// Primary function to process the physics and kinematics all bodies.
bool OrbitalAeroModel::update(double timeStep_seconds)
{
// It's important all forces are calculated before all positions are updated before all collisions
// are checked, etc. That way the order in which bodies are looped through does not affect how they
// affect other bodies in space.

// Calculate Motor Thrust (From control system and motor abilities.)

// Sum all the forces acting on every body, including forces from thrust, gravity, atmospheric drag,
// and friction.
processForces();

// Can now translate and rotate each body.
processKinematics(timeStep_seconds);

// After moving the body, check for collisions and adjust positions/velocities as appropriate.
processCollisions(timeStep_seconds);

return true;
}

Orbital Aero Code - processKinematics()


And the new code:

//  Translate and rotate bodies based on their mass, moments of inertia, and forces.
bool OrbitalAeroModel::processKinematics(double timeStep_seconds)
{
// Loop through all bodies and reposition them based on the forces.
map <uint64, BodyModel>::iterator iteratorPrimaryBody = tableBodies.begin();
while (iteratorPrimaryBody != tableBodies.end())
{
BodyModel &primaryBody = iteratorPrimaryBody->second;
if (primaryBody.active)
{
// Translation
if (primaryBody.massTotal_kilograms() > 0.0)
{
primaryBody.acceleration_metersPerSecond2 = primaryBody.forceTotal_newtons() / primaryBody.massTotal_kilograms();
}
else
{
primaryBody.acceleration_metersPerSecond2 = 0.0;
}
primaryBody.location_meters += (primaryBody.acceleration_metersPerSecond2 * (0.5 * timeStep_seconds * timeStep_seconds)) + (primaryBody.velocity_metersPerSecond * timeStep_seconds);
primaryBody.velocity_metersPerSecond += primaryBody.acceleration_metersPerSecond2 * timeStep_seconds;

// Rotation
// Not yet complete.

} // (primaryBody.active)
iteratorPrimaryBody++;
} // (iteratorPrimaryBody != tableBodies.end())
return true;
}

Results


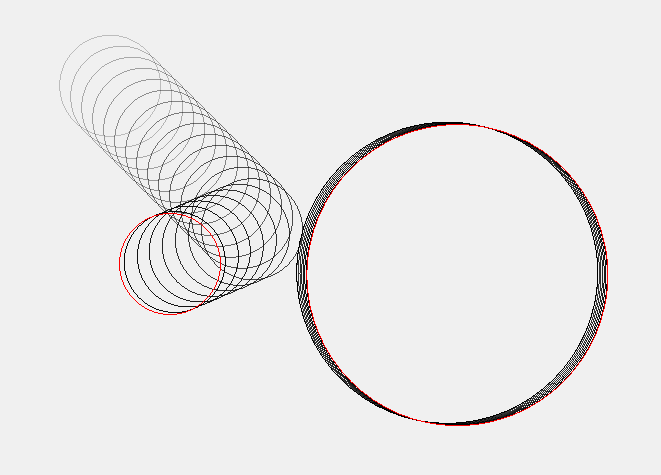
Nothing really new to look at that we haven't seen in previous screenshots. So here's a screenshot of a satellite moving around the moon that's moving around the Earth (with history trails on)...


Copyright (c) 2016 Clinton Kam
Permission is hereby granted, free of charge, to any person obtaining a copy of this software and associated documentation files (the "Software"), to deal in the Software without restriction, including without limitation the rights to use, copy, modify, merge, publish, distribute, sublicense, and/or sell copies of the Software, and to permit persons to whom the Software is furnished to do so, subject to the following conditions:
The above copyright notice and this permission notice shall be included in all copies or substantial portions of the Software.

THE SOFTWARE IS PROVIDED "AS IS", WITHOUT WARRANTY OF ANY KIND, EXPRESS OR IMPLIED, INCLUDING BUT NOT LIMITED TO THE WARRANTIES OF MERCHANTABILITY, FITNESS FOR A PARTICULAR PURPOSE AND NONINFRINGEMENT. IN NO EVENT SHALL THE AUTHORS OR COPYRIGHT HOLDERS BE LIABLE FOR ANY CLAIM, DAMAGES OR OTHER LIABILITY, WHETHER IN AN ACTION OF CONTRACT, TORT OR OTHERWISE, ARISING FROM, OUT OF OR IN CONNECTION WITH THE SOFTWARE OR THE USE OR OTHER DEALINGS IN THE SOFTWARE.

Wednesday, June 8, 2016

Orbital Aero Model: Direct Forces

The orbital aero model calculates one force I'm calling "Direct" - frictional force.

Friction


When two bodies are in contact with each other, they can produce a frictional force.

Friction force is calculated by the normal force between the two bodies multiplied by a coefficient of friction. The coefficient may be static or kinetic depending on the relative speed between the bodies.

If the bodies are stationary to each other, then the friction is "static"; if the bodies are sliding across each other, then the friction is "kinetic". The static coefficient is usually higher than the kinetic coefficient (it's harder to get something moving than to keep something moving).

The frictional force is opposite of the direction of travel. and the friction doesn't exceed the amount of force needed to keep the bodies locked together.

https://en.wikipedia.org/wiki/Friction

Normal and Surface Vector


The actual friction equation is very simple, but you need vectors normal and parallel to the surface to complete the calculations.

Since everything in my simulation is still a sphere, those values are pretty straightforward to determine.

Taking the unit vector of the relative locations between the two bodies gives me a unit normal vector. (Only for two spheres in contact.)


I came up with a couple ways to get the velocity component along the surface. (I'm sure there are many more!) I'm fairly happy with my second approach (please feel free to suggest alternatives!).

After getting the normal vector, I use the dot product of the relative velocity and the normal vector to get the speed of the bodies into each other. The resulting speed is a scalar (magnitude only, no direction).


I can multiple that speed scalar with the normal vector to get a velocity vector normal to contact.


Finally I can subtract the total relative velocity by the normal relative velocity to get the relative velocity along the surface.


Take the unit vector of that, and we get the motion of travel along the surface!


With the unit normal and surface vectors, we can finish the friction calculations.

Take the dot product of the relative force and the unit normal vector to get the normal force.


The magnitude of the friction force is the normal force * the coefficient of friction. And then multiply that value by the unit vector along the surface to get the friction force vector.


Finally add that frictional force vector to the sum of all the other forces acting upon that body.

Orbital Aero Code - update()


To recap from a previous post, there is an update() function in the OrbitalAeroModel class. I've made some cleanup and optimization changes to it compared to previous posts. The new update function combines Indirect and Direct forces into a single function call.

// Primary function to process the physics and kinematics all bodies.
bool OrbitalAeroModel::update(double timeStep_seconds)
{
// It's important all forces are calculated before all positions are updated before all collisions
// are checked, etc. That way the order in which bodies are looped through does not affect how they
// affect other bodies in space.

// Calculate Motor Thrust (From control system and motor abilities.)

// Sum all the forces acting on every body, including forces from thrust, gravity, atmospheric drag,
// and friction.
processForces();

// Can now translate and rotate each body.
processKinematics(timeStep_seconds);

// After moving the body, check for collisions and adjust positions/velocities as appropriate.
processCollisions(timeStep_seconds);

return true;
}

Orbital Aero Code - processForces()


The previous processIndirectForces function has been renamed processForces and it now includes the frictional forces.

// Function to loop through all bodies and sum the forces acting on them, including forces from
// thrust, gravity, atmospheric drag, and friction.
bool OrbitalAeroModel::processForces()
{
// Loop through all bodies and calculate their forces upon each other.

// The outer loop is for the primary body that we're calculating forces for.
map <uint64, BodyModel>::iterator iteratorPrimaryBody = tableBodies.begin();
while (iteratorPrimaryBody != tableBodies.end())
{
BodyModel &primaryBody = iteratorPrimaryBody->second;

// Only process the primary body if it's active.
if (primaryBody.active)
{
// Create a vector to contain the sum of all forces.
Vector sumForces_newtons;

   // Start with the thrust force of any onboard engines.
   sumForces_newtons = primaryBody.forceThrust_newtons;

   // The inner loop is for all other bodies that influence the primary.
   map <uint64, BodyModel>::iterator iteratorSecondaryBody = tableBodies.begin();
   while (iteratorSecondaryBody != tableBodies.end())
   {
    BodyModel &secondaryBody = iteratorSecondaryBody->second;

    // Only contribute the secondary body's influence if it's active and not the primary body.
    if (secondaryBody.active && (&primaryBody != &secondaryBody))
    {
    // Get the relative distance between the two bodies.
    Vector relativeDistance_meters = secondaryBody.location_meters - primaryBody.location_meters;
    double relativeDistanceMagnitude_meters = relativeDistance_meters.magnitude();

    if (relativeDistanceMagnitude_meters > 0.0)

    {
     // Calculate the force of gravity.
    .
    .
     // Are we within the atmosphere of the secondary body?
    .
    .

All the gravity and atmospheric drag code has remained unchanged. The friction code comes into play next...

      // Are the bodies in contact?
      double combinedRadii_meters = primaryBody.radius_meters + secondaryBody.radius_meters;
      if (relativeDistanceMagnitude_meters < (combinedRadii_meters + Constants::relativeDistanceForContact_meters))
      {
       // Apply friction forces.

       // Friction force is determined by the friction coefficient * the normal force between the bodies.

       // Getting the normal vector for spheres is simple, we can just take the unit vector
       // of our relative distance.
       Vector vectorNormalToContact = relativeDistance_meters.unit();

       // We also need a vector along the surface slope in our direction of travel to know the
       // direction the friction force is acting in. We can use the relative velocity between
       // the bodies and the normal vector to get the surface vector.

       // Get the relative velocity between the two bodies.
       Vector relativeVelocity_metersPerSecond = secondaryBody.velocity_metersPerSecond - primaryBody.velocity_metersPerSecond;

       // Calculate the magnitude of velocity going normal to the surface.
       double relativeSpeedNormalToContact_metersPerSecond = Vector::dotProduct(relativeVelocity_metersPerSecond, vectorNormalToContact);

       // Calculate the velocity vector that is normal to the surface.
       Vector relativeVelocityNormalToContact_metersPerSecond = vectorNormalToContact * relativeSpeedNormalToContact_metersPerSecond;

       // Now that we know the full relative velocity and the velocity component normal
       // to the surface, we can subtract those two to get the velocity component along
       // the surface. This vector is opposite of the direction of travel.
       Vector relativeVelocityAlongSurface_metersPerSecond = relativeVelocity_metersPerSecond - relativeVelocityNormalToContact_metersPerSecond;

       // And the unit vector of our surface velocity gives us the surface direction.
       Vector vectorAlongSurface = relativeVelocityAlongSurface_metersPerSecond.unit();

       // Determine coefficient of friction based on the speed along surface.
       double relativeSurfaceSpeed_meters = relativeVelocityAlongSurface_metersPerSecond.magnitude();
       double coefficientOfFriction = 0.0;
       if (abs(relativeSurfaceSpeed_meters) > Constants::relativeSpeedForKineticFriction_metersPerSecond)
       {
        // Body is moving, kinetic friction.
        coefficientOfFriction = Constants::defaultCoefficientKineticFriction;
       }
       else
       {
        // Body is not moving, static friction.
        coefficientOfFriction = Constants::defaultCoefficientStaticFriction;
       }

       // Friction force is based on the force pushing the two bodies together.
       // Gravitational force pulling them together plus the thrust of both bodies.

       // It is not necessary to take into account the gravitational forces of all the other
       // nearby bodies, as they will have an equal influence on both bodies.
       Vector relativeForce_newtons = secondaryGraviationalForce_newtons + primaryBody.forceThrust_newtons - secondaryBody.forceThrust_newtons;

       // Get the force magnitude by taking the dot product of the normal vector with the relative force.
       double normalForceMagnitude_newtons = Vector::dotProduct(relativeForce_newtons, vectorNormalToContact);

       // Friction Force = coefficientOfFriction * normalForce
       double frictionForceMagnitude_newtons = normalForceMagnitude_newtons * coefficientOfFriction;

       // Friction force is applied in the opposite direction of movement along the surface.
       Vector frictionForce_newtons = vectorAlongSurface * frictionForceMagnitude_newtons;

       // Apply friction force to the sum.
       sumForces_newtons += frictionForce_newtons;

       // Frictional force should be limited to the amount of force necessary to bring the body to a stop.
       // As implemented, this will cycle between continuously between the direction of travel to apply
       // friction. (It never allows the object to come to a complete stop.)
       // Friction should also cause the bodies to spin.

      } // (relativeDistanceMagnitude_meters < (combinedRadii_meters + Constants::relativeDistanceForContact_meters))
     } // relativeDistanceMagnitude_meters > 0.0

    } // ((secondaryBody.active) && (primaryBody.index != secondaryBody.index))
    iteratorSecondaryBody++;
   } // (iteratorSecondaryBody != tableBodies.end())
   primaryBody.forceIndirect_newtons = sumForces_newtons;
  } // (primaryBody.active)
  iteratorPrimaryBody++;
 } // (iteratorPrimaryBody != tableBodies.end())
 return true;
}

Results


In this example, a body is just above the Earth falling towards it. It does a short couple bounces (I'll cover that code later), and then friction brings it to a stop.


I also tried adding a thrust force down when the body was in contact with the ground; stops sooner.


When it comes to the friction code, it could be greatly improved upon in the future. Bodies should have different properties (smooth vs rough), friction should cause bodies to spin, and I'm applying the full static force even when stopped (their friction forces constantly twitch back and forth when stationary). For my purposes now it gives nice results for when objects scrape along the ground.

Copyright (c) 2016 Clinton Kam
Permission is hereby granted, free of charge, to any person obtaining a copy of this software and associated documentation files (the "Software"), to deal in the Software without restriction, including without limitation the rights to use, copy, modify, merge, publish, distribute, sublicense, and/or sell copies of the Software, and to permit persons to whom the Software is furnished to do so, subject to the following conditions:
The above copyright notice and this permission notice shall be included in all copies or substantial portions of the Software.
THE SOFTWARE IS PROVIDED "AS IS", WITHOUT WARRANTY OF ANY KIND, EXPRESS OR IMPLIED, INCLUDING BUT NOT LIMITED TO THE WARRANTIES OF MERCHANTABILITY, FITNESS FOR A PARTICULAR PURPOSE AND NONINFRINGEMENT. IN NO EVENT SHALL THE AUTHORS OR COPYRIGHT HOLDERS BE LIABLE FOR ANY CLAIM, DAMAGES OR OTHER LIABILITY, WHETHER IN AN ACTION OF CONTRACT, TORT OR OTHERWISE, ARISING FROM, OUT OF OR IN CONNECTION WITH THE SOFTWARE OR THE USE OR OTHER DEALINGS IN THE SOFTWARE.

Sunday, May 22, 2016

Raspberry Pi Server

I've been using a company that offers subversion (SVN) hosting, and it has been working very well. Subversion is an excellent way to manage code/resources. It keeps records of every change, notes on each change, and who committed the changes. Git is another, probably more popular, code/resource management system. Although Git has some technical advantages, especially with larger remote teams, I find it overly complicated when I just want to mess with my own projects. If you have ongoing coding projects, set yourself up with some kind of revision control such as Subversion or Git. Trust me!

As my projects have grown in size, the cost to host them remotely is also increasing. On top of that, I just want to have my Raspberry Pi do some useful server stuff for me anyways. So, I moved all my SVN hosting to my local Raspberry Pi. Then I thought - shoot a local FTP server would come in handy to transfer files, let me get that setup. I've got some projects that could be hosted on a website in the future, let me get that setup. It would be nice to remotely login to the Raspberry Pi so it no longer needs a keyboard/screen, let me get that setup.


There are tons of tutorials for each individual task online already, but at this point writing about my snowball of requirements may be something useful to others. So I'll do my best to recap what I did! (I was basically done by the time I thought others may find this helpful.)

I'm working with a Raspberry Pi B+. At the time I bought it, it was the highest performance Pi on the market. I'll probably buy a Raspberry Pi 3 fairly soon and do all the instructions all over again. (So did I write this to help others online? Or just so I wouldn't forget all the steps when I do it again in a few months? ... Can it be both?)

Quick list of what will be done:

1. Setup Network
2. Shell Access (SSH)
3. Version Control (SVN)
4. File Transfer (SFTP)
5. Web Server


My steps...

1 Setup Network

You may have your Raspberry Pi using DHCP (Pi asks your router for the IP address), but in my case my Pi will not necessarily be connected to my router. Only do the following steps if you want a static IP! If you can access the Internet right now with your Pi and you don't have a reason to change it, then you're probably good - skip this step.

To configure the network from a terminal window:
sudo nano /etc/network/interfaces


The lines with "lo" are for configuring the loopback.

To configure the ethernet device for static IP:
iface eth0 inet static
My local network is 10.0.1.### so I configured the IP address to something memorable and out of the way (high):
address 10.0.1.200

All computers on my local network are 10.0.1.###, so I configured the subnet to:
netmask 255.255.255.0

Broadcast to my local network:
broadcast 10.0.1.255

And the gateway set to:
gateway 10.0.1.1


In nano, hit CTRL X to exit, Y to agree to save, and then push enter to confirm the filename.

And restart the networking:
sudo ifdown eth0 && sudo ifup eth0

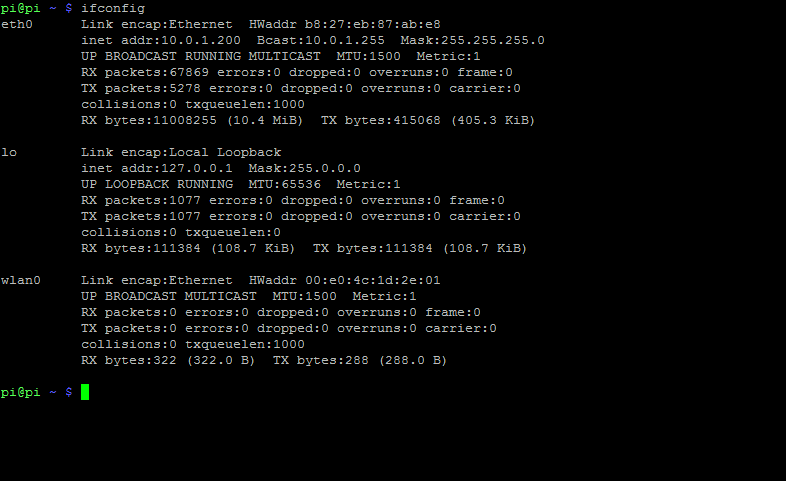
To see how the network is configured, type:
ifconfig


2 Shell Access (SSH)

I have no plans on using X Windows on the Raspberry Pi, so remote shell access is more than enough for me. I downloaded PuTTY as a SSH Client on my Windows computer so that I could login to my Raspberry Pi remotely.

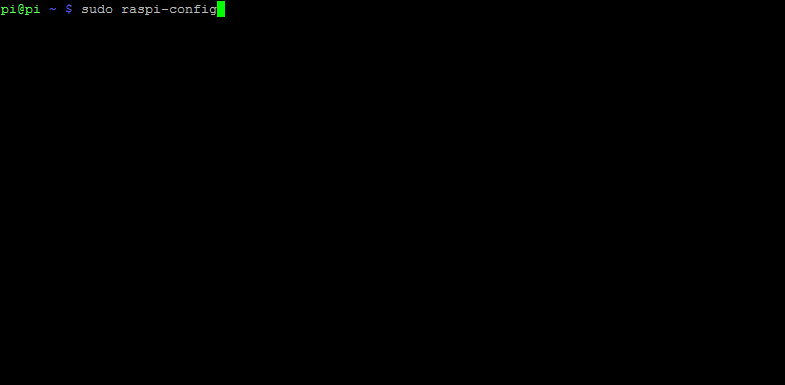
To enable shell access on the Raspberry Pi, type:
sudo raspi-config


Then select "8 Advanced Options"


Then select "A4 SSH"


Then select "Enable"


The SSH server should be good to go!

I set my Pi to a static IP address of 10.0.1.200.

When I run PuTTY on my Windows computer:


And clicking Open...


No more keyboard and monitor required for the Pi!

3 Version Control (SVN)

To download and install the SVN software:
sudo apt-get install subversion

Then to create the folder for all the repositories to be held:
mkdir -p /home/pi/repos

Then create each repository:
svnadmin create /home/pi/repos/projectname
Where projectname is what your project is. I created a half dozen, including "arduinoComputer", "gps", and "orbitalAero".


Finally download and install Apache SVN:
sudo apt-get install apache2 libapache2-svn

Edit dav_svn.conf:
sudo nano /etc/apache2/mods-available/dav_svn.conf


The file has a bunch of entries almost ready to go, they're just commented out. I modified mine to look like:
<Location /svn>

  # Uncomment this to enable the repository
  DAV svn

  #Alternatively, use SVNParentPath if you have multiple repositories under
  # a single directory (/var/lib/svn/repo1, /var/lib/svn/repo2, ...)
  # You need either SVNPath and SVNParentPath, but not both.
  SVNParentPath /home/pi/repos

  # Basic Authentication is repository-wide. It is not secure unless
  # you are using https.  See the 'htpasswd' command to create and
  # manage the password file - and the documentation for the
  # 'auth_basic' and 'authn_fiel' modules, which you will need for this
  # (enable them with 'a2enmod').
  AuthType Basic
  AuthName "Subversion Repository"
  AuthUserFile /etc/apache2/dav_svn.passwd

  # Require a valid account to checkout.
  Require valid-user

</Location>

In nano, hit CTRL X to exit, Y to agree to save, and then push enter to confirm the filename.

Restart Apache:
sudo /etc/init.d/apache2 restart

Then change the permissions of the repository folder:
sudo chown -R www-data:www-data /home/pi/repos

Then create the user:
sudo htpasswd -c /etc/apache2/dav_svn.passwd <username>
where <username> is your login name.

You can navigate to the repository using your web browser.
In my case: 10.0.1.200/svn/gps

(This screenshot was taken after I committed the GPS and Libraries folders in the following steps.)

However, viewing in the web browser isn't very helpful. At this point I went back to my Windows computer. I use TortoiseSVN so I can have a nice GUI to interact with my repos.

I did a checkout of each of the new projects from the Raspberry Pi to my Windows computer.


I copied the latest code of each project into their corresponding new repository, then committed them into the Raspberry Pi.


Unfortunately I lost all my change logs up to that point, but that's ok.

By the way - take a look at the Tortoise Log screenshot above. It has a record of every commit to the repository, who did it, the date, and all the files that have changed. If you double click on one of the files, it shows you all the changes that were made. If you went down a rabbit hole with your code and decided it's a disaster, you can revert back to any prevision revision. If you see a weird change to a file and are wondering who / what / when / why it happened, you can do that by looking at the log! You definitely want to use some kind of version control such as SVN or Git or similar!

4 File Transfer (SFTP)

I want easy file transfer access to my Pi for sharing files / backup purposes. SFTP (SSH File Transfer Protocol) is turn-key once you have SSH going!

Both WinSCP and FileZilla work very well for this purpose.

I created a Pi site with IP address 10.0.1.200


And connected!


Now I can drag files / folders between my workstation and the Pi server. To modify some files I have to log into the Pi as root (or change the folder's permissions).

5 Web Server

Apache was already installed in the SVN steps above, but if you skipped them, then from a terminal window type:
sudo apt-get install apache2

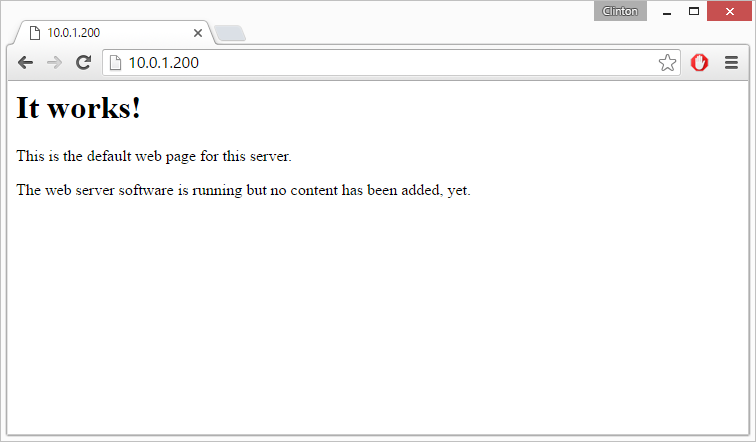
The default folder for the website is /var/www


And when opened in a web browser:


One of my projects will be taking advantage of this web server soon*!

* Soon is a very relative term. ;-)

A few handy functions when dealing with Apache...

To stop Apache (SVN and website):
sudo /etc/init.d/apache2 stop

To start Apache (SVN and website):
sudo /etc/init.d/apache2 start

To restart Apache (SVN and website):
sudo /etc/init.d/apache2 restart