Sunday, April 25, 2021

RPG: 3D Art Assets from Unity

I really like the Diablo 1 / Diablo 2 art style, but I don't have the time or skill to model that number of 3D characters. Even though I'm not using Unity as the game engine, it has an asset store with a huge library of 3D models that many of which match my desired art style. So, how about use the Unity art assets and just convert them into sprites for my game? I had no experience with Unity and I've got plenty of work to do without becoming a Unity expert, so I attempted the least amount of work possible to generate usable sprite sheets.

To generate the sprites from the 3D models, I found an asset called "Animation Baking Studio" for $24. As a test I found some free models that I'll likely replace in the future, but they're far better placeholders than the eyesores I had before.

My steps to produce a sprite sheet from a 3D model (written here for my own documentation just as much to help someone else!):

1. Create a new Unity project.

2. Wait for it to build...

3. Go to Window->Package Manager, under Packages select "My Assets". Import "Animation Baking Studio" and the desired art model.

4. Wait for the import...

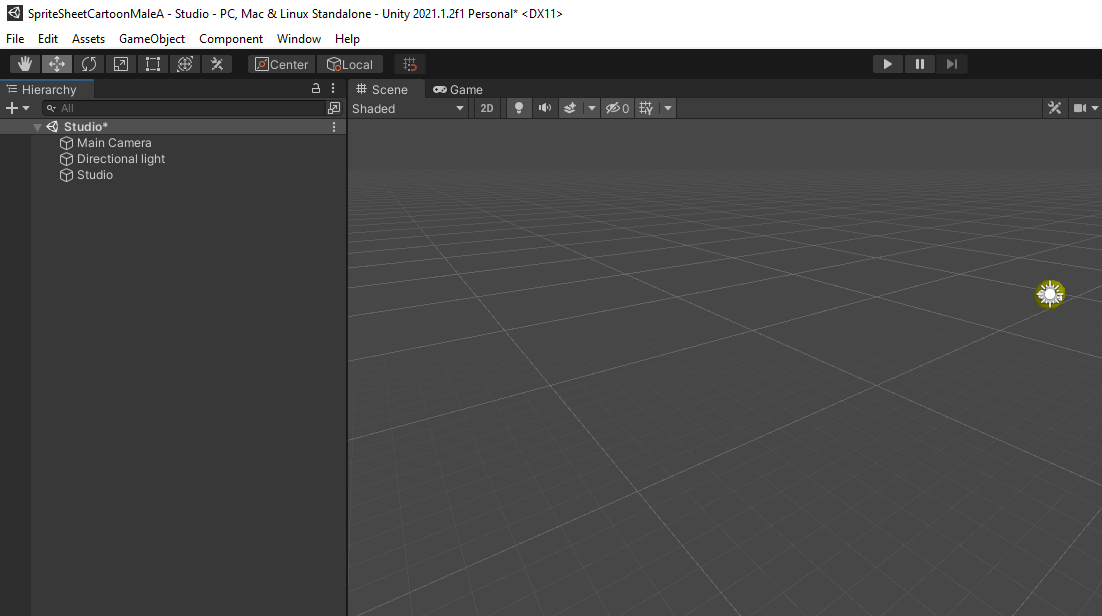
5. Navigate to Assets->AnimationBakingStudio in the Project, double click Studio. Studio will be selected in the Hierarchy.

6. Delete the sample models under the Hierarchy.

7. Navigate to the desired asset model, drag from the Project folder into the Hierarchy window.

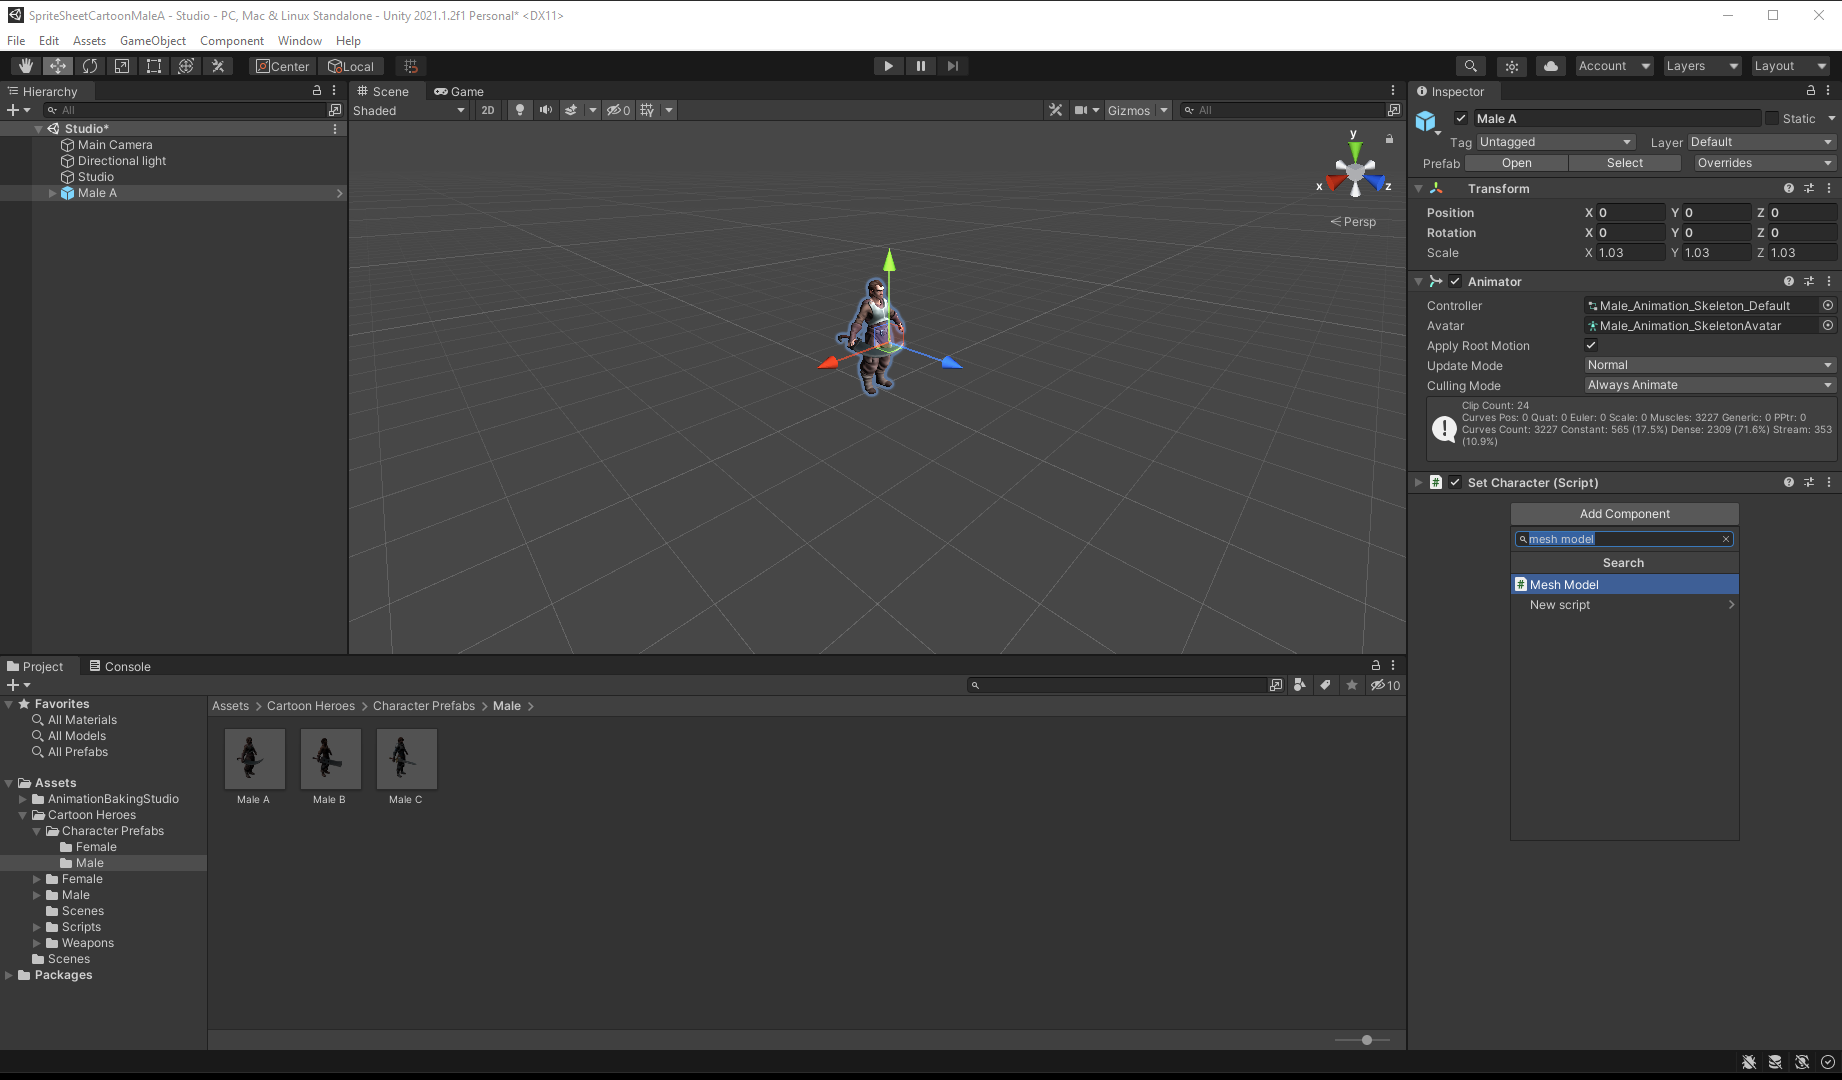
8. Select the new art model in Hierarchy, in the Inspector on the side, click add Component and select "Mesh Model (Script)".

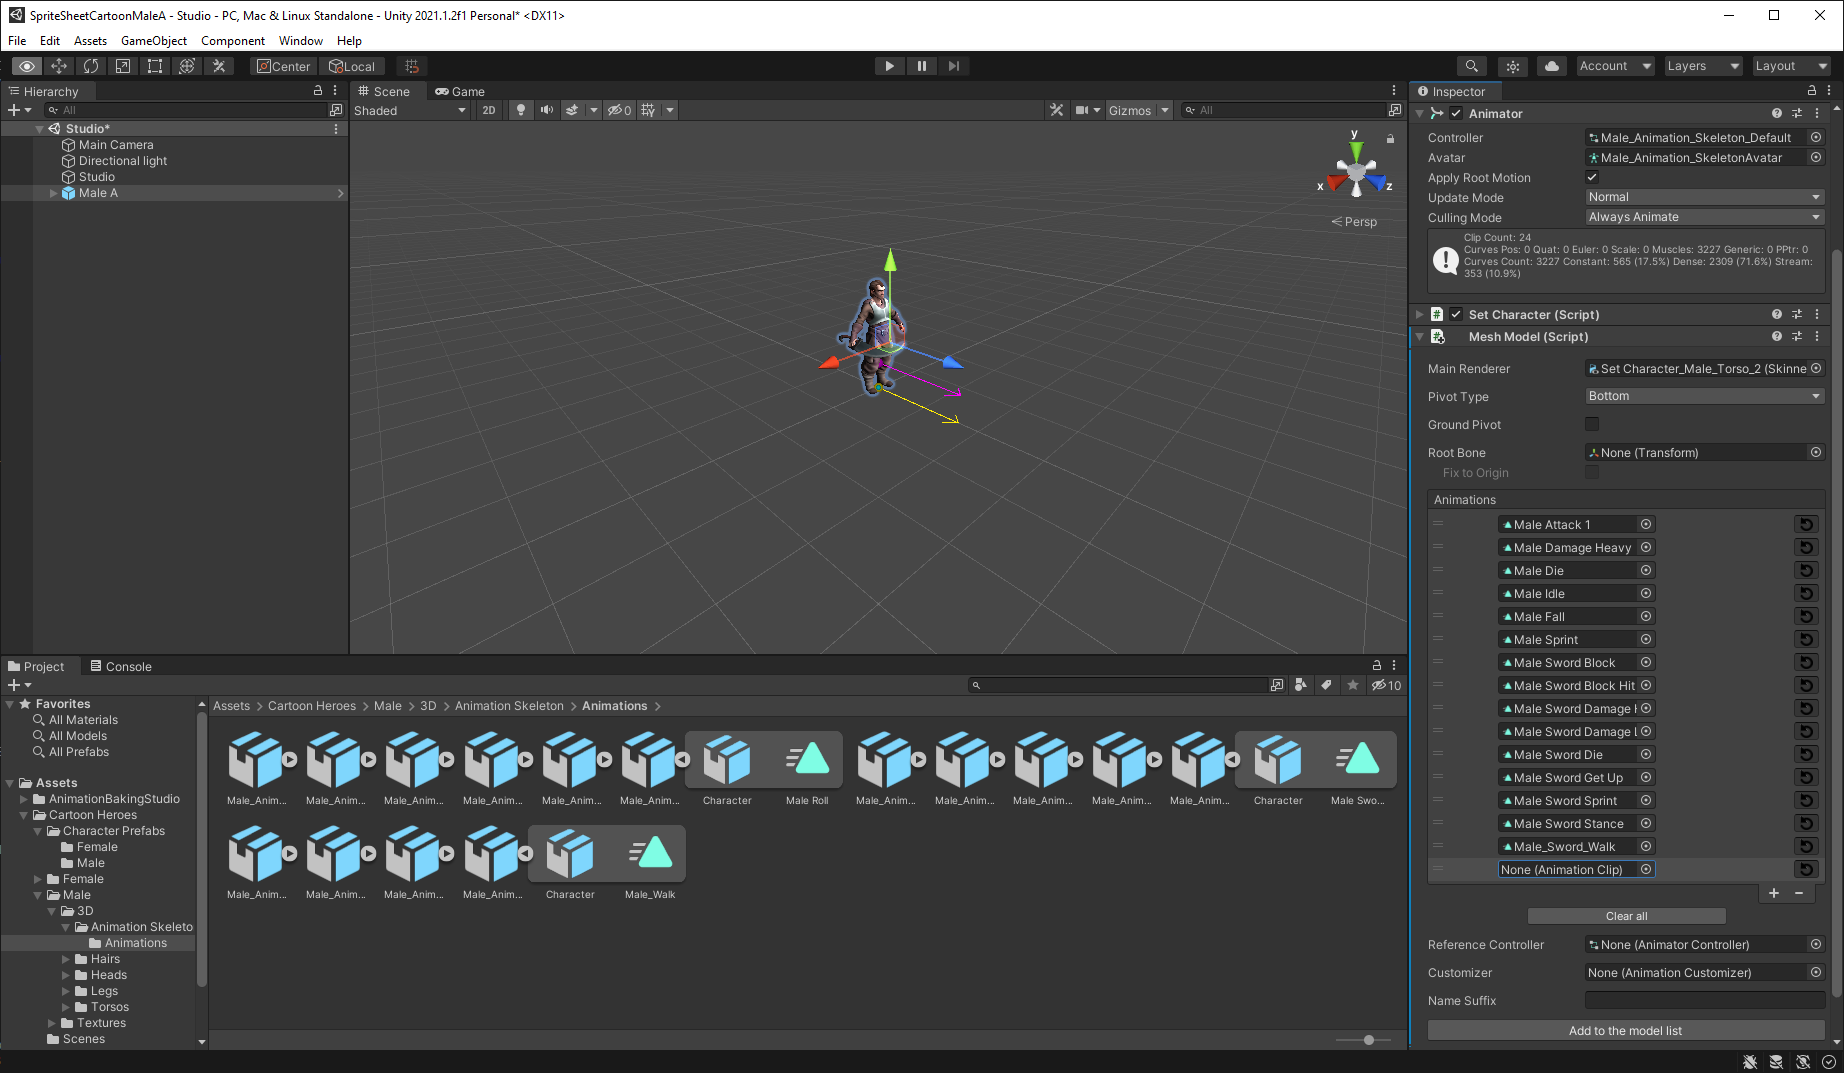
9. Drag all desired animations into Mesh Model (Script) Animations list. This is so the AnimationBakingStudio will know which animations to apply to the character.

10. Select "Studio" under "Studio" in Hierarchy. In the Inspector "Models" section, drag the desired art asset in.

I'm still fine tuning the options to find what works best, but my current setup is as follows:

Main Camera:
  Perspective, Field of View 60 deg
  Relative Distance, 2
Directional Light: Directional light (Light)
  Follow Camera Rotation Checked
  Follow Camera Position Checked
Model Rotation:
  View Slope Angle 30
  Show Reference Tile Unchecked
  View Size 8
  Base Angle 0
  Angles checked: 0, 45, 90, 135, 180, 225, 270, 315
Shadow Type:
  None
Extractor:
  DefaultExtractor
Apply Variation:
  Unchecked
Show Preview:
  Checked
  Background Type: Checker
Resolution:
  X: 150, Y: 150
  Frame Size: 10
  Simulate: 0
  Delay: 0
Trim:
  Unchecked
  (Ensure Unified for All Frames is also Unchecked, otherwise a bug prevents it from generating the animations. Developer said they'll have the bug fixed in the next version though.)
Pack:
  Unchecked
Make Animation Clip
  Checked, Frame Rate 20, Interval 1
  Make Animator Controller Unchecked
  Make Prefab Unchecked
  Generate Normal Map Unchecked
File Name Prefix: Empty
Output Directory: As Desired

11. Once the options have been entered, click "Bake all models".

12. And wait for the render...

13. When it's complete, navigate to the sprite sheet folder and enjoy!

I made some modifications to how sprites are loaded in my game so I don't need to do any additional processing on the images. The game can load the Unity exported images as is; including even the files names. I still have some changes to make to support all the animation frames, but the proof of concept is overwhelming successful.

Again long term I'll likely not use these 3D art assets, but it's a gigantic step from where I was and now I've developed the process for potentially all future characters in the game.

There may be better ways to do this in Unity, but so far this has been the least amount of effort for greatest return I've found.


Sunday, March 28, 2021

RPG: Map Pins / Packaged Build / Sounds

Map Pins

This month had many improvements in the game. First off are Map Pins. I don't like the modern ARPG mechanic of "here's a quest you don't need to read, here's an arrow on your mini map pointing directly to the quest location, break everything there, and after that you'll get a new arrow with where to go next". Players don't read the quest text because there isn't any need to. On the other hand, modern players aren't going to get out the graph paper and take copious amounts of notes (nor should they have to).

I liked how Dragon Warrior on the NES did quests. You had to talk to the NPCs to get clues on where to go and what to do. But if you wanted to have any sort of break from the game, you were going to have to jot down a few notes to remember how everything came together for the next time you played. Just a few words and a marker on the map would suffice.

My game's presentation is of a giant map you're walking around on. What better way for a user to write down notes on quest items than as pins on a map. In the bottom right section under Notes, you can select to "Add Map Pin".


A dialog box will then appear where the map is centered asking for a name. (You can pan the map using the middle mouse button, so the map pins can be placed anywhere; not just where your player is.)


Give it a name, and the pin is placed! Multiple pins on the map...


Adding pins for areas I've never even been to but someone told me to go there...


You can toggle the visibility of the pins with the "Show Pins on Map" checkbox. Now someone can play the game, get a clue of a quest item, mark it on the map, and even if they don't play for weeks they'll have their notes loaded and ready to go. But at the same time it's not the modern complete hand-holding of a "go here arrow".  


Packaged Build

Something very important in software development (or anything really) is fast iteration and minimizing steps to deployment. When just debugging on my local computer it wasn't a big deal, but I commonly test this multiplayer with other computers. I've added a Post-Build event when compiling in Release to execute a batch file that packages the game up in a ready to deploy zip file.


One click in Visual Studio and I have a build ready for release...


It's not uploading anywhere (I'm not at that point yet), but that will be the natural addition to the script when the time comes.

Sounds

A while ago I had added random sounds that game characters could play (birds chirping from trees). Last month I added sounds when you got hurt. I had considered sounds to be a minor part of the game, but the more I played with them the more ideas I had.

All the code handling loading sounds and what sounds to use has now been externalized. Terrain tiles can now play sounds (waves on the beach), different sounds play depending on what you're moving on (walking on gravel vs walking on dirt vs walking on stone), and attack sounds play when using weapons. All volumes are adjusted based on your distance from them source of the sound.


These few additions have really made the world more immersive. When standing in the town, a street musician could be playing a song (fairly loud if you're close by). The beach isn't far off so you can hear the waves on the shore but much quieter than the musician. Then occasionally you'll hear birds chirping from the trees. If you walk through town on the path you get a unique sound for it.

Since the birds chirping is random and the volumes are based on your distance, it sounds very natural and immersive. (And if you cut down all the nearby trees, you won't hear birds singing anymore!) Sounds went from a minor part of the game to something that can be really key to the gameplay.


Sunday, February 28, 2021

RPG: Various Updates

Various updates this month to the game:

  • Packet counter to debug network message traffic.

Which was used to dramatically reduce the number of packets sent over the network so it's far more efficient.

  • Fixed bugs with the new collision detection / avoidance and pathfinding.
  • Now playing "hurt" sound effects when the player is hit by a monster.


Saturday, January 30, 2021

RPG: Pathfinding

This month I decided to tackle pathfinding, and it came out really well. The world is a giant grid of tiles - some you can walk through, some you can't, and some you can only walk into from certain directions.

I'm using the A* algorithm to find paths from a character's current position to its destination. The A* algorithm as implemented is smart enough to know which tiles can only be entered by limited directions.

In addition to the A* algorithm to pathfind the static tiles, there are also obstructions of dynamic characters that can be in the way. And those obstructions can be of 2 shapes - circular (tree for example) or rectangle (bed for example).

If the moving character encounters one of these dynamic obstructions, it traverses around the obstruction in the shortest route possible to stay on its A* path.


Enemies are far more deadly now; you can't just hide behind a tree and get them stuck. Also it's now trivial for me to have villagers pathfind across town to accomplish various activities throughout the day.


Saturday, December 26, 2020

RPG: Networked Events and Time of Day

The character states and magical effects were being shared between the server and clients, but interactions were not. The client players couldn't go up to a NPC and talk, heal, buy/sell, or enable tactics. It was a substantial amount of work, but client players can now do all interactions with a NPC that the server itself could do. Even the inventory of a client character is shared to the server so server events that check if a player was carrying an item works.

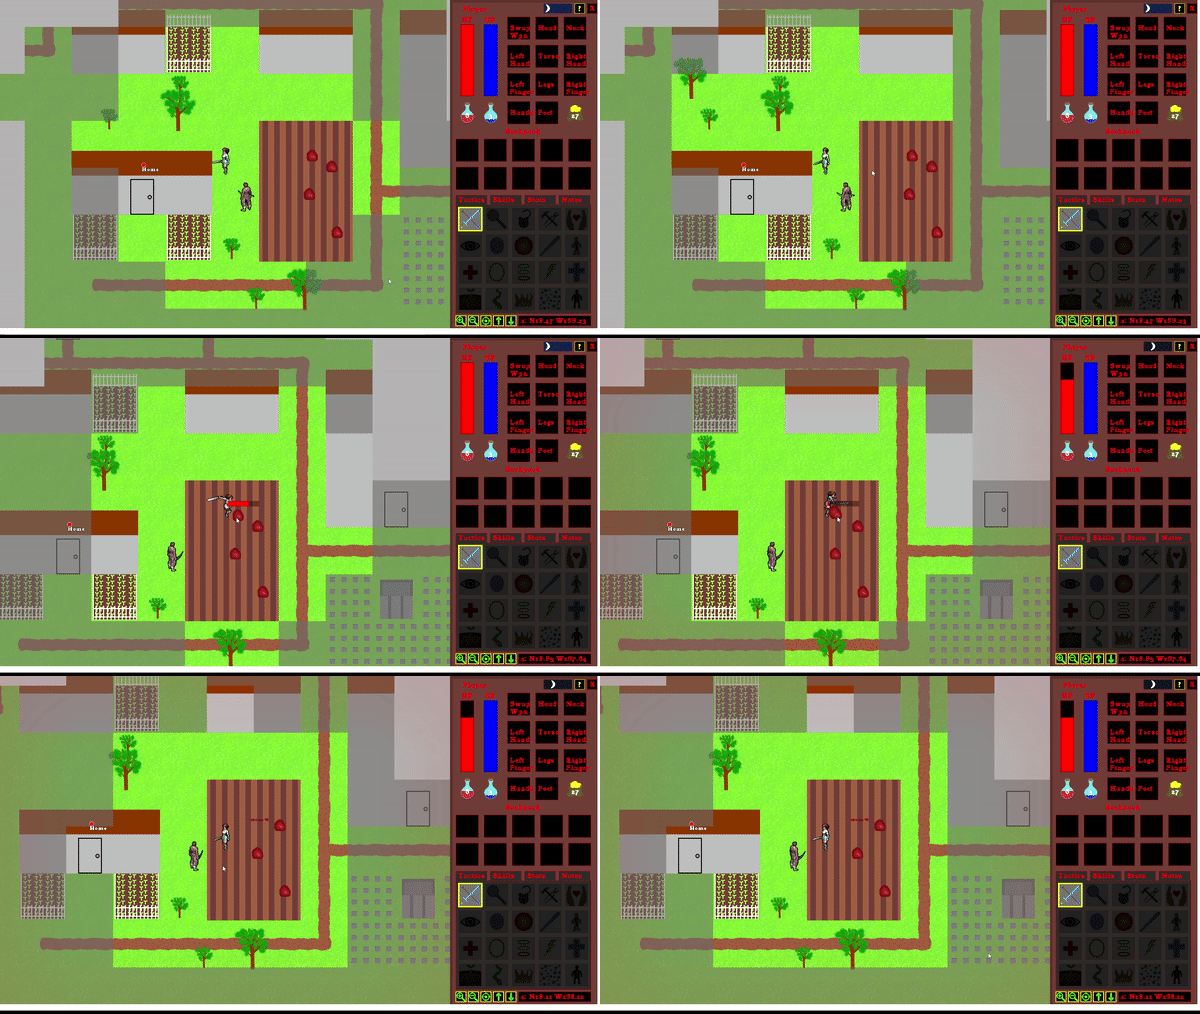
As the engine improves, I need more content to test its capabilities and have something to "play". I added the concept of time of day and events that can be triggered off that time. As well as actions that can create or remove characters. Now I can have pirates that show up on the coast when it gets late, raid the village, then leave. The time of day also influences how much the player can see. During the night the vision radius reduces substantially.


There is an indication of the current time of day at the top right of the game screen. (In the above screenshot, it's close to midnight with very limited visibility.)

NPCs can now also be scripted to go to specific lat/lon locations on the map. There is no pathfinding yet though so they can get hung up on the corners of buildings pretty easily. That will have to be improved upon.

Another content item is if you chop down larger trees they'll leave behind logs of wood which you can sell at the lumbermill.

On the game play side,  I've added a delay between when a character begins an attack animation and when the weapon does damage. Damage now coincides with the instant the weapon's animation touches the target as opposed to the start of the animation. In addition to just looking better, this adds more options to tactical combat (adds the ability to dodge).

Wednesday, November 25, 2020

Backup Generator Power

We frequently lose power in the fall/winter months, and no power means no lights, no refrigerator, no water, and no heat. We had a portable generator and ran extension cords into the house through a cracked door, but that was far from ideal. (And even though the generator was several feet from the barely cracked front door with foam filling the gap, I can still confirm the Carbon Monoxide detector in the house works.)

A very cheap and relatively simple way to tie a generator directly into the house is via an interlock switch. Add a inlet to the outside of the house wired into a circuit breaker in the main electrical panel. The interlock is a simple strip of metal that slides up or down to prevent both the utility main and the generator inlet from both being engaged simultaneously. (Very very bad things happen if utility main power can get to the generator and very very dangerous situations happen if the generator is back filling power to downed power lines.)

Another option is to use a Transfer Switch, but that requires far more wiring as you have to pick specific circuits to be powered by the portable generator and wire them into a separate electrical panel.

The only 2 upsides I know of for a transfer switch is:

1. With an interlock switch, you have to make sure to not enable power hungry devices such as ovens and electric furnaces. With the transfer switch those aren't even available to turn on.

2. With a transfer switch, you can leave the main power enabled so you can know when the power is restored to the house to those few circuits that aren't on the transfer switch.

However the interlock is cheaper and far simpler overall. Definitely the way for me.

There are far better tutorials than mine online on how to do this; the following is really just notes to myself and ways to share it with others I know that are interested in doing it. Disclaimer: The work was permitted / inspected / approved, but I'm not an electrician and you shouldn't trust anything I say.


I patched up a prior hole in the wall that was an old dryer vent. It's at a perfect place underneath the panel and I want to cover up how ugly it looks anyways. Here's a picture of the patched exterior (paint still drying) with a coupler to guide the wire into the house. (I saw other installers just pushing the wire directly through the wall and caulking around it, but that looked pretty poor to me. I like this much better.)

And on the inside... (That's construction adhesive around the patch.)

Total cost for the mini conduit piece and wire clamp was less than $5.

For the plug itself, I went with the Reliance 30-Amp Generator Power Inlet Box for $49.98. I picked it up at the local Lowers but it's readily available online.


The 4.5 out of 5 stars is no surprise, this is a great inlet box. It takes the typical 240V 30 Amp generator extension cord and can be wired to the house panel.

Mounting the box...

For this inlet I needed 10/3 wire. The 10/3 Romex (NM-B) wire that you get at big box stores will have 2 insulated hot wires (red and black), 1 insulated neutral wire (white), and a bare ground. I only needed to go about 6 feet, so I got the smallest bundle from Lowes (15 feet) for $31.69.

This wire is only for interior applications; if you're connecting to anything outside the house then you'll need the exterior grade wire instead. Apparently even though my inlet box is mounted on the outside wall of the house, it's still ok to use the Romex NM-B as it's considered interior wiring. 

Routing the wire into the panel...


Now comes the most difficult part of the whole thing. You must get the proper interlock kit for the panel, and the descriptions on local hardware stores and Amazon are not clear what they're compatible with. I ended up getting part numbers off my electrical panel and contacting Square D customer support. They replied back with the exact interlock kit I needed: "Square D HOMCGK2C Homeline Cover Generator and QOM2 Frame Size Main Breaker Interlock Kit", and it fits perfect.

The interlock kit includes a clamp down for the breaker (required by code for any breakers that supply power into the panel) and the metal slide that prevents both the generator inlet and main power from both being simultaneously engaged. $42.89

And to wire the inlet into the panel, I got a Square D Homeline 30 Amp 2-Pole standard circuit breaker. The "2-Pole" is how the breaker is 240V - it connects to both hot wires which are out of phase. If your electrical connection is bridging both hots, then 120 + 120 = 240V. Just $9.95

And here is the installed breaker with the clamp supplied by the interlock kit. The inlet breaker must be installed in a specific spot so the interlock switch can slide over it. I ended up having to move my 240V breaker for the water pump from the bottom left breaker (position 2/4) to the top to make space available.


Mounting the slide was actually a piece of cake. It comes with a template that slots into the holes of the panel cover. Drill some pilot holes with a smaller drill bit then go back with the larger bit. Then you just tighten the slide on with the supplied bolts.

The only problem I had in this process was when the wind blew my instructions onto the only fresh pile of chicken feces on the front porch.

Panel cover back on...


So the panel is good to go now, but the generator needs a bit of work.

Main utility power is a pure 60 Hz sine waveform. That's considered clean power and is what AC (Alternating Current) devices such as refrigerator compressors, water pumps, etc. expect. Portable generators can deliver power as a modified sine wave (basically a square wave or close to it) or a pure sine wave. They're both at 60 Hz, but the square wave shape is not the clean waveform the electrical device is expecting. If the generator creates a pure sine wave, then it's called an "Inverter Generator".

Having a modified sine-wave go through AC motors such as compressors and water pumps can generate additional heat and decrease the life of those devices. How much so? Hard to know. But it made me nervous enough to not want to have my devices on modified sine-waves for extended periods of time. Inverter Generators are more expensive than their modified sine-wave counterparts, but the piece of mind of not worrying if I'm damaging my equipment is worth it.

Of Note: I have an older modified sine-wave generator that I originally planned to run into a UPS then on to my electrical devices. However, standard UPSs will completely reject dirty square wave power and will not charge from them or clean up their power. You can buy UPSs that will accept the dirty power and clean it up to a pure sine wave, but they're so expensive you might as well get an Inverter Generator to begin with.

I ended up buying a Champion 6250-Watt DH Series Open Frame Inverter with Quiet Technology for $1032.17.

It is an "Inverter Generator", has a relative highly continuous load rating (5000 watts), delivers 240V via L14-30R outlet, has very nice maintenance accessibility, and solid reviews. I'm not powering an electric car charger or my electric furnace with this, but it has enough continuous power for the house lights, water pump, refrigerator, and wood pellet stove (to keep the house warm).

One gotcha with tying the generator to the house is whether or not it has a bonded neutral. The 240V L14-30R outlet has 4 wires - 2 hots, 1 neutral, and 1 ground. These portable generators are meant for taking out to a job site, starting them up, and plugging the tools in. For that typical use-case, the generator comes delivered with a bonded neutral - the neutral wire is connected to the frame of the generator alongside the ground wire.

In a house electrical panel, the neutral wires are also bonded to the ground wires along the same bus bars. But apparently some squirrely things can happen if the house has the neutral & ground wires bonded AND the generator has the neutral & ground wires bonded. I won't even pretend to understand it well enough to confidently explain it.

There are plenty of warnings out there to not modify your generator and to use a special GFI transfer switch instead to solve this ground loop problem. However, the official Champion website has instructions and a video explaining exactly how to disconnect the neutral wire to get a "floating neutral". The generator would no longer be safe as a portable device on a job site, but it would no longer have the ground loop problem when tied into the house.

Note on the front of the generator: "NEUTRAL BONDED TO FRAME".


If I used a multimeter to check continuity between the neutral and ground of the 240V outlet, there was no resistance.

The steps are super easy; this generator was definitely made with intention of swapping the neutral connection. Remove the front panel.


The corner terminal has a white wire (the neutral) and a couple ground wires (yellow/green) connected to it. All that has to be done is the neutral wire removed from that bolt and wrapped up so it can't connect to anything.


Reattach the front panel and use the multimeter to confirm that I now have a floating neutral; the neutral is no longer bonded to ground.


Last item to buy was a 15' 30 Amp rated extension cord with NEMA L14-30P/L14-30R ends. After the inspector approved of my wiring, we did a successful test! 


Again I'm not a professional; this is what worked for me and I have yet to burn anything down.

Costs:
$5 Electrical Clamps / Conduit
$49.98 Reliance 30-Amp Generator Power Inlet Box
$31.69 10/3 Romex (NM-B)
$9.95 Square D Homeline 30 Amp 2-Pole Circuit Breaker
$42.89 Square D HOMCGK2C and QOM2 Interlock Kit
$86.30 Electrical Permit
$1032.17 Champion 6250-Watt Generator (5000 Watt continuous, Inverter Generator)
$43.69 15' 30 Amp L14-30 Extension Cord
----------
$1301.67 Total


Thursday, October 29, 2020

RPG: Memory Reduction

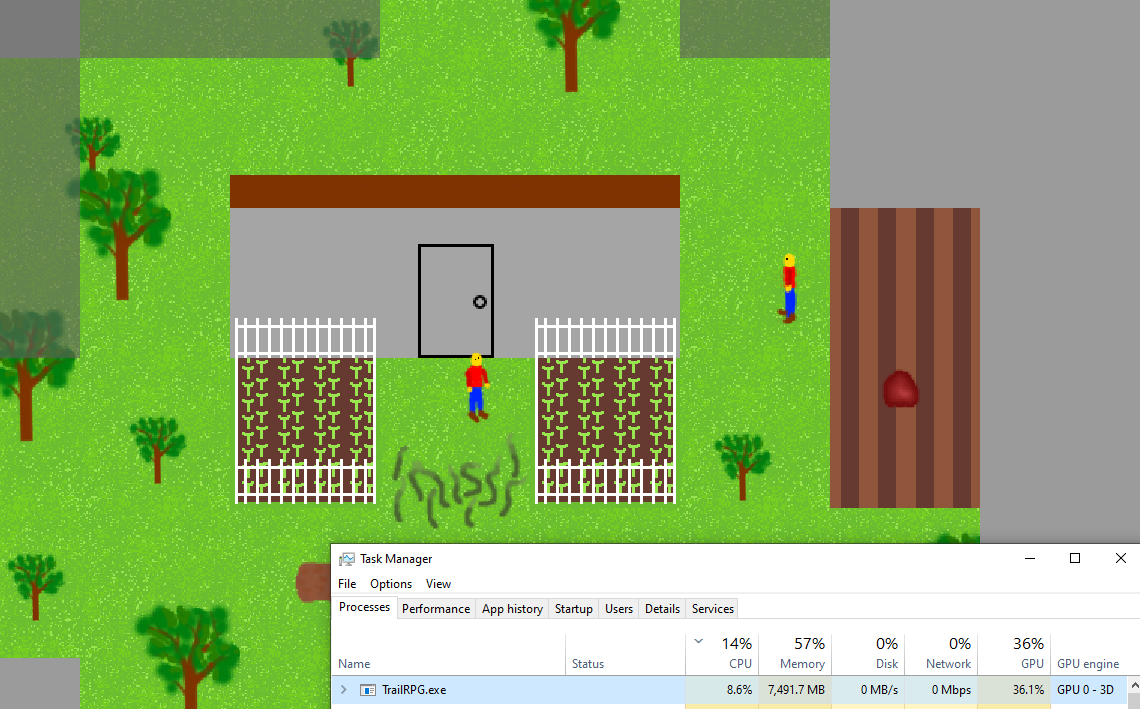
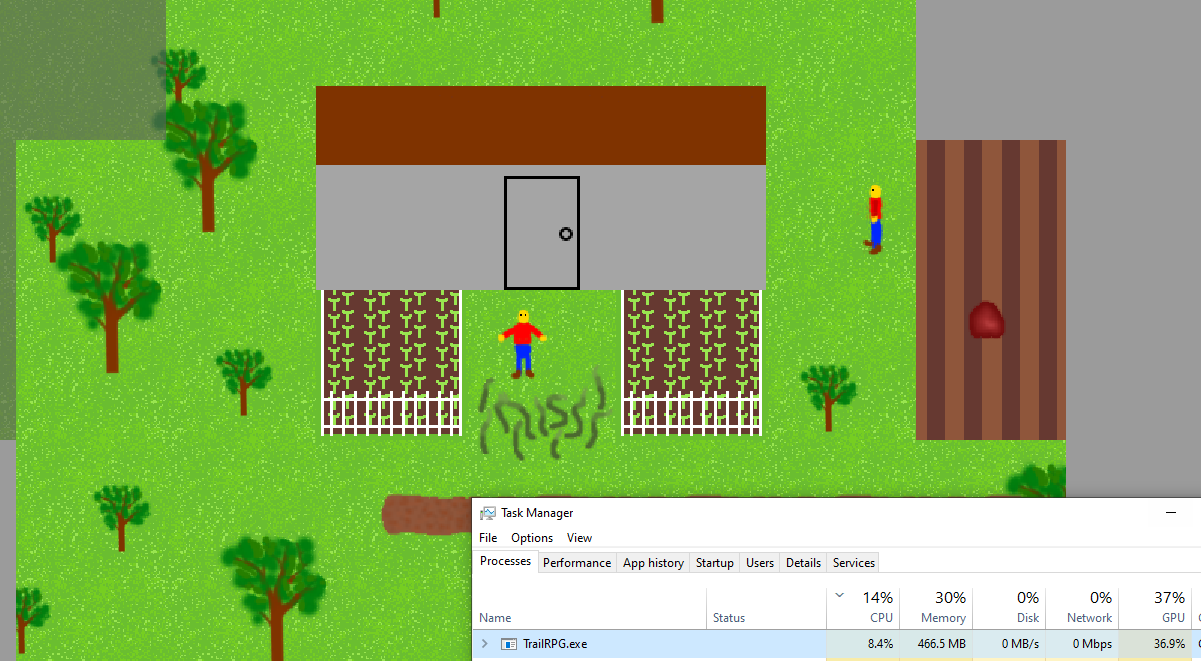
 Although CPU performance was improved to a solid 60 Hz, memory usage skyrocketed.


Each depth of the map has a ground tile and a canopy (roof) tile. When rendering the scene, the ground tile is drawn followed by characters followed by the canopy tile. That way a building roof can be drawn over characters.

For now we have 5 depths (that will grow) and 4 animations for terrain (that will likely increase as well). So: 5 depths x 2 (ground/canopy) x 4 (animations) = 40 tile maps.

I was generating at startup every one of those tile maps. That actually turned out to be totally unnecessary and very memory wasteful. To update all the tiles in a tile map from one level to another (8 in total) only takes a fraction of a second - barely noticeable. So I've replaced 40 tile maps with just the 8 that are in a single depth and the player has a trivial pause when the view switches between depths..

The difference in memory usage is unbelievable - 93% less:


There were lots of graphical glitches with canopies, walking to the edges of building, and other UI elements not redrawing properly that I've also now fixed. Even though the game still looks awful, the underlying engine drawing it is becoming much more capable.

Also did a network test, 3 players all fighting in the world together!


The network test went great. Found a handful of bugs (including an especially funny one of dead players that weren't resurrected quickly getting transported to the middle of the world based on monster respawn logic) but the game was really fun.